Lexus NX: Removal
REMOVAL
PROCEDURE
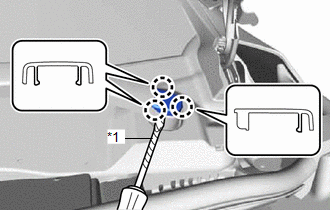
1. REMOVE FRONT WIPER ARM HEAD CAP
| (a) Using a screwdriver, detach the 3 claws and remove the front wiper arm head cap. HINT:
|
|
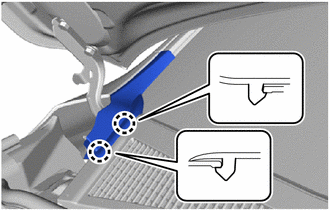
2. REMOVE WINDSHIELD WIPER ARM AND BLADE ASSEMBLY LH
| (a) Remove the nut and the windshield wiper arm and blade assembly LH. |
|
3. REMOVE WINDSHIELD WIPER ARM AND BLADE ASSEMBLY RH
| (a) Remove the nut and the windshield wiper arm and blade assembly RH. |
|
4. REMOVE COWL TOP VENTILATOR LOUVER SUB-ASSEMBLY
| (a) Detach the 2 claws of the front fender to cowl side seal LH. HINT: It is not necessary to fully remove the front fender to cowl side seal LH. |
|
| (b) Detach the 2 claws of the front fender to cowl side seal RH. HINT: It is not necessary to fully remove the front fender to cowl side seal RH. |
|
| (c) Remove the 2 clips. |
|
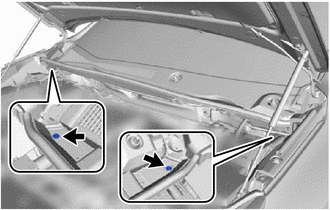
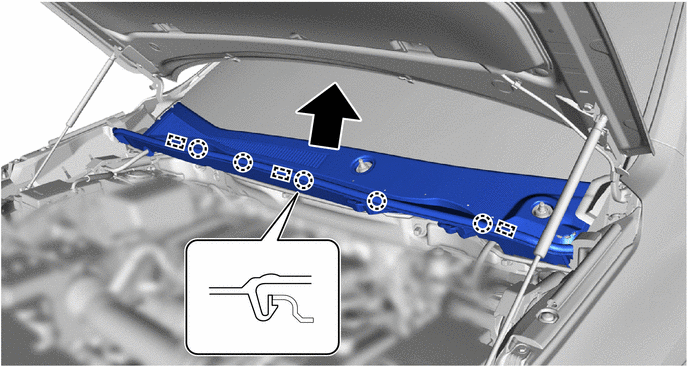
(d) Detach the 5 claws and 3 guides, and then lift up the part in the direction indicated by the arrow in the illustration.
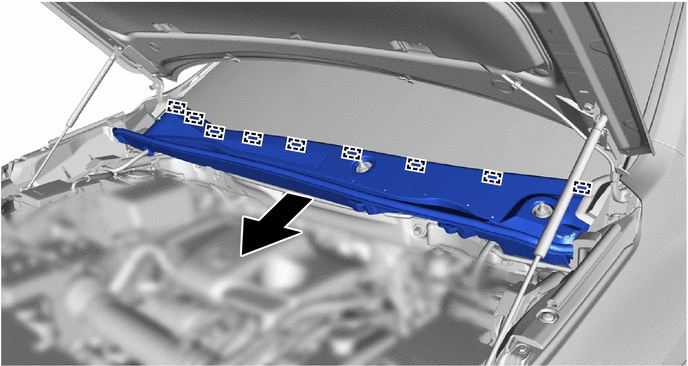
(e) Pull the part in the direction indicated by the arrow in the illustration to detach the 9 guides and remove the cowl top ventilator louver.
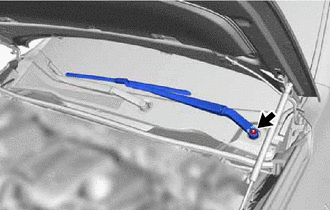
5. REMOVE WINDSHIELD WIPER MOTOR AND LINK ASSEMBLY
NOTICE:
Be careful not to damage the windshield when removing the windshield wiper motor and link assembly.
(a) Remove the 2 bolts.
(b) Detach the motor grommet as shown in the illustration.
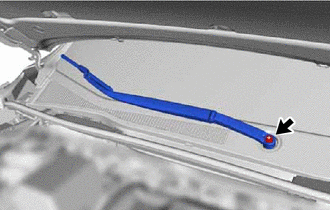
| (c) Detach the clamp. |
|
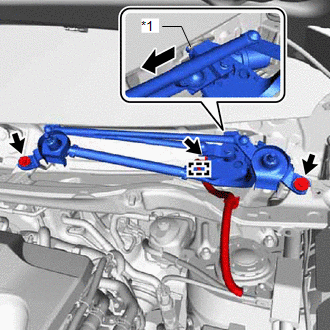
(d) Disconnect the connector and remove the windshield wiper motor and link assembly.
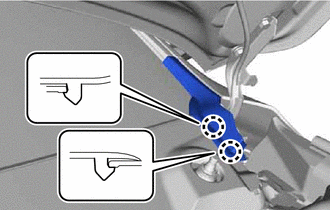
6. REMOVE WINDSHIELD WIPER MOTOR ASSEMBLY
| (a) Using a screwdriver, separate the No. 1 windshield wiper link rod from the windshield wiper motor crank pivot as shown in the illustration. HINT: Tape the screwdriver tip before use. |
|
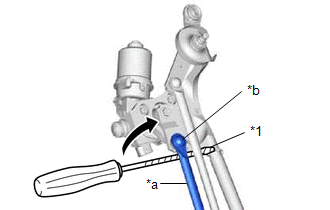
| (b) Using a screwdriver, hold the windshield wiper motor crank as shown in the illustration. HINT: Tape the screwdriver tip before use. |
|
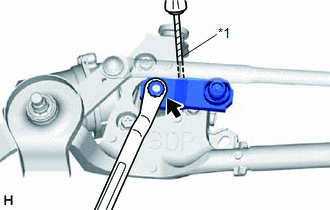
(c) Remove the nut and windshield wiper motor crank from the windshield wiper motor assembly.
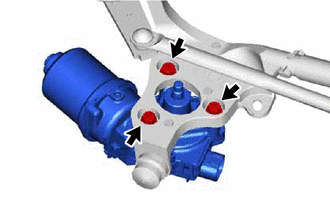
| (d) Remove the 3 bolts and windshield wiper motor assembly from the link. |
|
READ NEXT:
 Installation
INSTALLATION PROCEDURE 1. INSTALL WINDSHIELD WIPER MOTOR ASSEMBLY (a) Install the windshield wiper motor assembly to the windshield wiper link assembly with the 3 bolts. Torque: 5.4 N·m {55 kgf·cm,
Front Wiper Rubber
ComponentsCOMPONENTS ILLUSTRATION *1 FRONT WIPER BLADE LH *2 WIPER RUBBER LH ReplacementREPLACEMENT CAUTION / NOTICE / HINT HINT:
Use the same procedure for RHD and LHD vehicles.
Headlight Cleaner Actuator
ComponentsCOMPONENTS ILLUSTRATION *1 HEADLIGHT CLEANER WASHER BRACKET *2 HEADLIGHT WASHER ACTUATOR SUB-ASSEMBLY LH *3 HEADLIGHT WASHER ACTUATOR SUB-ASSEMBLY RH *4 NO. 2 HEADLIGHT
SEE MORE:
Headlight Cleaner Motor and Relay Circuit
DESCRIPTION The headlight ECU sub-assembly RH controls the headlight cleaner motor and pump assembly. WIRING DIAGRAM CAUTION / NOTICE / HINT NOTICE:
First check that the front washer operates normally.
Inspect the fuses for circuits related to this system before performing the following inspec
HV Main Relay (P3110-223)
DESCRIPTION The hybrid vehicle control ECU monitors the IGCT relay and detects the following malfunction. DTC No. Detection Item DTC Detection Condition Trouble Area MIL Warning Indicate P3110-223 HV Main Relay IGCT relay stuck on (+B short): IGCT relay is stuck on or a short to
