Lexus NX: Components
COMPONENTS
ILLUSTRATION
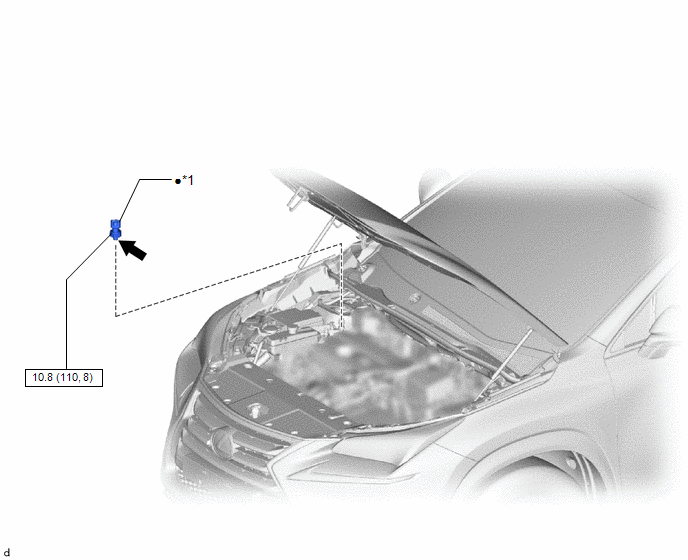
| *1 | AIR CONDITIONER PRESSURE SENSOR | - | - |
.png) | N*m (kgf*cm, ft.*lbf): Specified torque | ● | Non-reusable part |
.png) | Compressor oil ND-OIL 11 or equivalent | - | - |
READ NEXT:
 On-vehicle Inspection
ON-VEHICLE INSPECTION PROCEDURE 1. INSPECT AIR CONDITIONER PRESSURE SENSOR (a) Check the wire harness. *a Component without harness connected (Air Conditioner Pressure Sensor) *b Component
Removal
REMOVAL PROCEDURE 1. RECOVER REFRIGERANT FROM REFRIGERATION SYSTEM Click here 2. REMOVE AIR CONDITIONER PRESSURE SENSOR (a) Disconnect the connector. (b) Using a 27 mm deep socket
Installation
INSTALLATION PROCEDURE 1. INSTALL AIR CONDITIONER PRESSURE SENSOR (a) Remove the vinyl tape from the liquid pipe sub-assembly and the connecting part of the air conditioner pressure sensor. (b) Apply
SEE MORE:
Headlight aim
Vertical movement adjusting
bolts
Type A
Adjustment bolt A
Adjustment bolt B
Type B
Adjustment bolt A
Adjustment bolt B
Before checking the headlight
aim
Make sure the vehicle has a full tank
of gasoline and the area around the
headlight is not deformed.
Park the v
Inspection
INSPECTION PROCEDURE 1. INSPECT HEATER ACCESSORY ASSEMBLY *a Component without harness connected (Heater Accessory Assembly (Heater Water Pump)) (a) Check the motor operation. (1) Apply the positive (+) lead of the auxiliary battery to terminal 2 and the negative (-) lead to terminal 1. OK:
© 2016-2026 Copyright www.lexunx.com
