Lexus NX: Components
Lexus NX Service Manual / Vehicle Interior / Lighting (int) / Back Door Courtesy Switch / Components
COMPONENTS
ILLUSTRATION
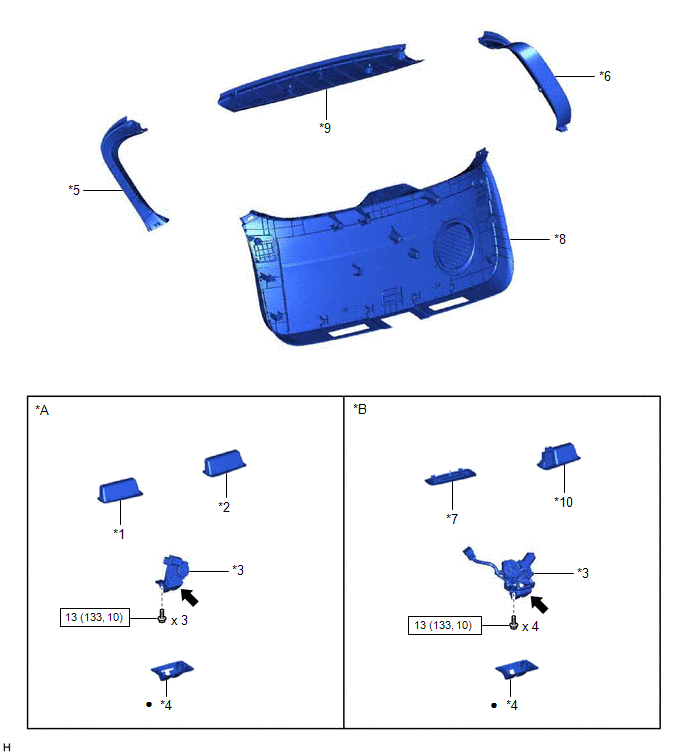
| *A | w/o Power Back Door | *B | w/ Power Back Door |
| *1 | BACK DOOR FINISH COVER LH | *2 | BACK DOOR FINISH COVER RH |
| *3 | BACK DOOR LOCK ASSEMBLY (BACK DOOR COURTESY SWITCH) | *4 | BACK DOOR LOCK COVER |
| *5 | BACK DOOR SIDE GARNISH LH | *6 | BACK DOOR SIDE GARNISH RH |
| *7 | BACK DOOR TRIM BASE | *8 | BACK DOOR TRIM BOARD ASSEMBLY |
| *9 | CENTER BACK DOOR GARNISH | *10 | PULL HANDLE |
.png) | N*m (kgf*cm, ft.*lbf) : Specified torque | ● | Non-reusable part |
.png) | MP grease | - | - |
READ NEXT:
 Removal
REMOVAL PROCEDURE 1. REMOVE CENTER BACK DOOR GARNISH Click here 2. REMOVE BACK DOOR SIDE GARNISH LH Click here 3. REMOVE BACK DOOR SIDE GARNISH RH Click here 4. REMOVE BACK DOOR FINISH COVER
Inspection
INSPECTION PROCEDURE 1. INSPECT BACK DOOR LOCK ASSEMBLY (BACK DOOR COURTESY SWITCH) (a) w/o Power Back Door: (1) Move the back door lock assembly to the lock position. *1 Latch *
Installation
INSTALLATION PROCEDURE 1. INSTALL BACK DOOR LOCK ASSEMBLY (BACK DOOR COURTESY SWITCH) HINT:
When installing a new back door lock assembly (back door courtesy switch), if there is a rope on the asse
SEE MORE:
Slide Sensor Malfunction (B2650)
DESCRIPTION When the front power seat switch LH does not receive a sensor signal despite forward or backward movement of the seat by power seat motor operation, this DTC is stored. DTC No. Detection Item DTC Detection Condition Trouble Area B2650 Slide Sensor Malfunction The forward
Removal
REMOVAL PROCEDURE 1. PRECAUTION Click here 2. REMOVE SERVICE PLUG GRIP Click here 3. DRAIN COOLANT (for Inverter Coolant) Click here 4. DISCONNECT WIRE HARNESS (a) Disconnect the 4 wire harness clamps from the inverter reserve tank assembly and inverter with converter assembly.
© 2016-2026 Copyright www.lexunx.com
