Lexus NX: Components
COMPONENTS
ILLUSTRATION
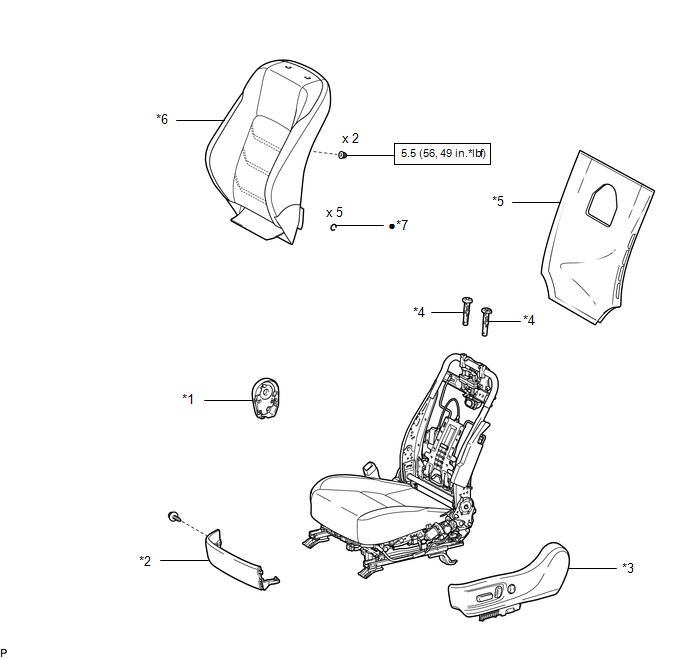
| *1 | FRONT INNER SEAT CUSHION SHIELD LH | *2 | FRONT LOWER SEAT CUSHION SHIELD |
| *3 | FRONT SEAT CUSHION SHIELD LH | *4 | FRONT SEAT HEADREST SUPPORT |
| *5 | SEATBACK FELT | *6 | SEPARATE TYPE FRONT SEATBACK COVER WITH PAD |
| *7 | HOG RING | - | - |
.png) | N*m (kgf*cm, ft.*lbf): Specified torque | ● | Non-reusable part |
ILLUSTRATION
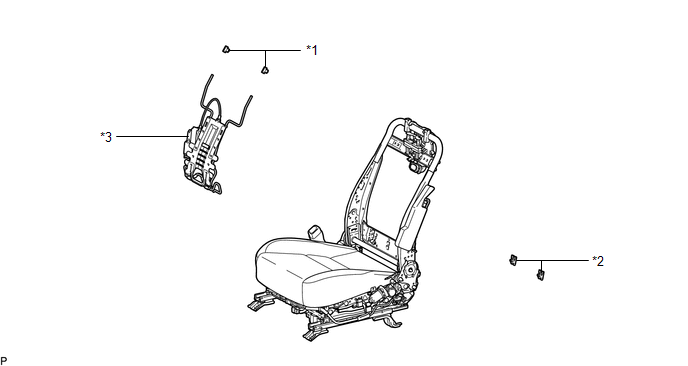
| *1 | FRONT NO. 1 SEATBACK HOOK | *2 | FRONT SEATBACK EDGE PROTECTOR |
| *3 | LUMBAR SUPPORT ADJUSTER ASSEMBLY LH | - | - |
READ NEXT:
 Removal
REMOVAL CAUTION / NOTICE / HINT CAUTION: Wear protective gloves. Sharp areas on the parts may injure your hands. PROCEDURE 1. REMOVE FRONT SEAT ASSEMBLY LH Click here 2. REMOVE FRONT LOWER SEAT CUS
Inspection
INSPECTION PROCEDURE 1. INSPECT LUMBAR SUPPORT ADJUSTER ASSEMBLY LH (a) Check the operation of the lumbar support adjuster assembly LH. (1) Apply auxiliary battery voltage to the lumbar support adj
Installation
INSTALLATION CAUTION / NOTICE / HINT CAUTION: Wear protective gloves. Sharp areas on the parts may injure your hands. PROCEDURE 1. INSTALL LUMBAR SUPPORT ADJUSTER ASSEMBLY LH (a) Attach the 2 hooks to
SEE MORE:
Pre-collision System Warning Buzzer
ComponentsCOMPONENTS ILLUSTRATION *1 RADIO RECEIVER ASSEMBLY *2 SKID CONTROL BUZZER ASSEMBLY (PRE-COLLISION SYSTEM WARNING BUZZER) InspectionINSPECTION PROCEDURE 1. INSPECT SKID CONTROL BUZZER ASSEMBLY (PRE-COLLISION SYSTEM WARNING BUZZER) (a) Apply battery voltage and check the op
Airbag ECU Malfunction (B1000)
DESCRIPTION The airbag ECU assembly consists of a deceleration sensor, safing sensor, drive circuit, diagnosis circuit, ignition control, etc. If the airbag ECU assembly receives signals from the deceleration sensor, it determines whether or not the SRS should be activated. DTC B1000 is stored when
© 2016-2026 Copyright www.lexunx.com
