Lexus NX: Components
COMPONENTS
ILLUSTRATION
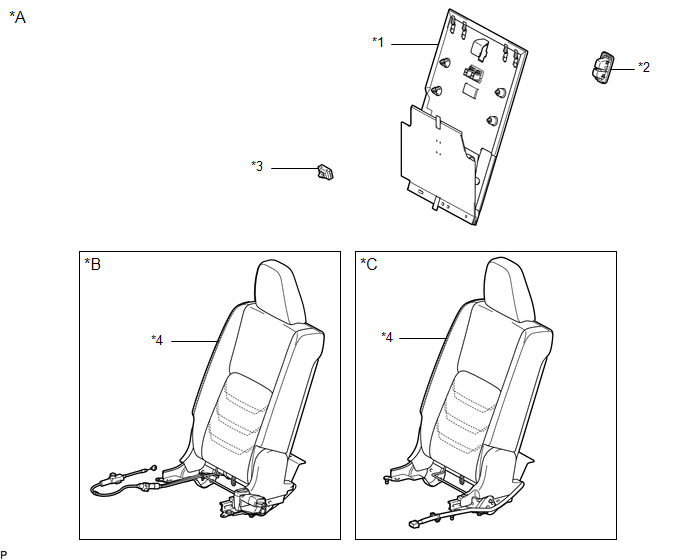
| *A | for RH Side | *B | for Manual Seat |
| *C | for Power Seat | - | - |
| *1 | REAR SEATBACK ASSEMBLY RH | *2 | REAR SEATBACK BOARD CARPET ASSEMBLY RH |
| *3 | REAR SEATBACK COVER | *4 | SEAT HEATER CONTROL SUB-ASSEMBLY |
ILLUSTRATION
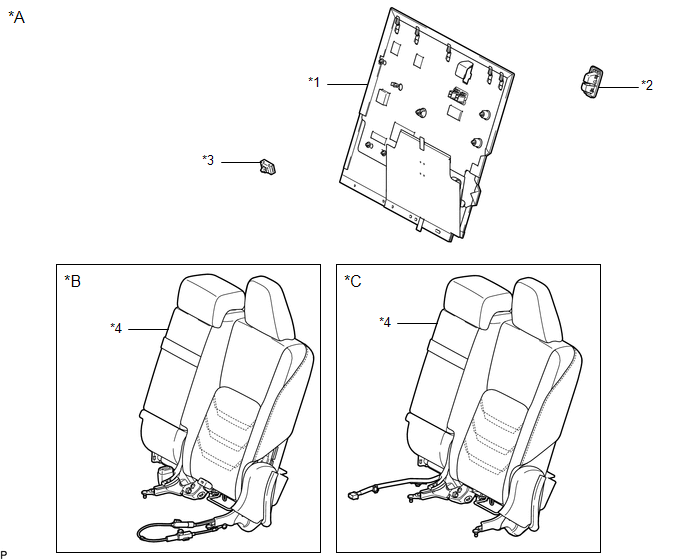
| *A | for LH Side | *B | for Manual Seat |
| *C | for Power Seat | - | - |
| *1 | REAR SEATBACK ASSEMBLY LH | *2 | REAR SEATBACK BOARD CARPET ASSEMBLY LH |
| *3 | REAR SEATBACK COVER | *4 | SEAT HEATER CONTROL SUB-ASSEMBLY |
READ NEXT:
 Removal
REMOVAL CAUTION / NOTICE / HINT CAUTION: Wear protective gloves. Sharp areas on the parts may injure your hands. PROCEDURE 1. REMOVE REAR SEATBACK ASSEMBLY LH (a) for Manual Seat: Click here (b) for
Installation
INSTALLATION CAUTION / NOTICE / HINT CAUTION: Wear protective gloves. Sharp areas on the parts may injure your hands. PROCEDURE 1. INSTALL SEAT HEATER CONTROL SUB-ASSEMBLY (for LH Side) (a) for Manual
Seat Heater Switch(for Rear Seat)
ComponentsCOMPONENTS ILLUSTRATION *1 CONSOLE BOX REGISTER ASSEMBLY *2 REAR CONSOLE END PANEL SUB-ASSEMBLY *3 REFRESHING SEAT SWITCH *4 DUCT RemovalREMOVAL PROCEDURE 1. REMOVE
SEE MORE:
ECM Power Source Circuit
DESCRIPTION When the power switch is turned on (IG), auxiliary battery voltage is applied to the IGSW terminal of the ECM. The output signal from the MREL terminal of the ECM causes current to flow to the coil of the EFI-MAIN relay, closing the contacts of the EFI-MAIN relay and supplying power to t
Removal
REMOVAL PROCEDURE 1. REMOVE NO. 3 DECK BOARD SUB-ASSEMBLY Click here 2. REMOVE REAR DECK FLOOR BOX Click here 3. REMOVE DECK FLOOR BOX LH Click here 4. PRECAUTION CAUTION: Be sure to read Precaution thoroughly before servicing. Click here NOTICE: After the power switch is turned off, there m
© 2016-2026 Copyright www.lexunx.com
