Lexus NX: Components
COMPONENTS
ILLUSTRATION
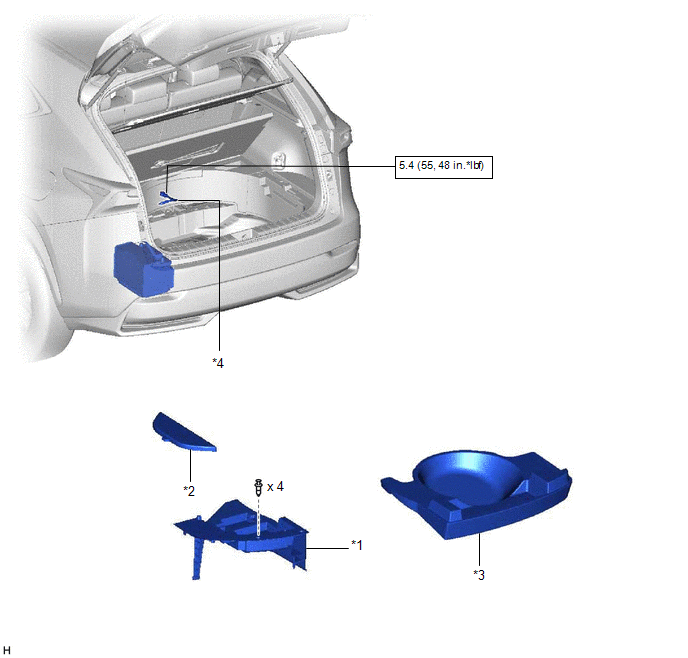
| *1 | DECK FLOOR BOX LH | *2 | NO. 3 DECK BOARD SUB-ASSEMBLY |
| *3 | REAR DECK FLOOR BOX | *4 | AUXILIARY BATTERY NEGATIVE TERMINAL |
.png) | N*m (kgf*cm, ft.*lbf): Specified torque | - | - |
ILLUSTRATION
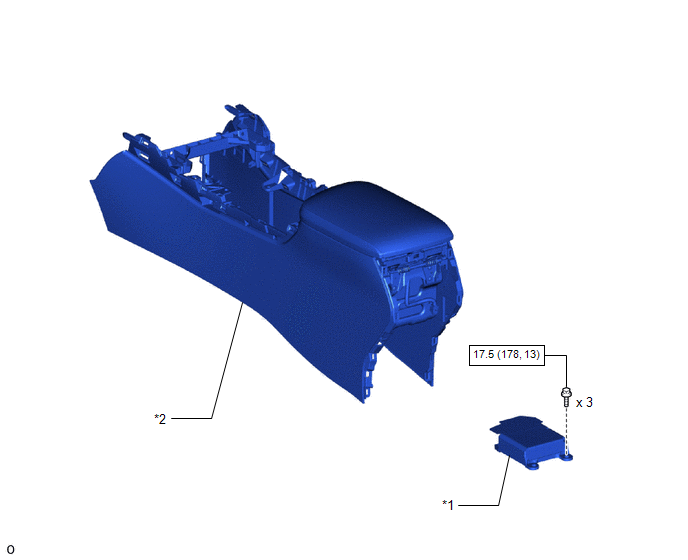
| *1 | AIRBAG ECU ASSEMBLY | *2 | FRONT CONSOLE BOX |
| | N*m (kgf*cm, ft.*lbf): Specified torque | - | - |
READ NEXT:
 On-vehicle Inspection
ON-VEHICLE INSPECTION CAUTION / NOTICE / HINT CAUTION: Be sure to follow the correct removal and installation procedures of the airbag ECU assembly. PROCEDURE 1. INSPECT AIRBAG ECU ASSEMBLY (for Vehic
Removal
REMOVAL PROCEDURE 1. REMOVE NO. 3 DECK BOARD SUB-ASSEMBLY Click here 2. REMOVE REAR DECK FLOOR BOX Click here 3. REMOVE DECK FLOOR BOX LH Click here 4. PRECAUTION CAUTION: Be sure to read Precau
Installation
INSTALLATION PROCEDURE 1. INSTALL AIRBAG ECU ASSEMBLY (a) Check that the power switch is off. (b) Check that the cable is disconnected from the negative (-) auxiliary battery terminal. CAUTION: Wait a
SEE MORE:
Television Camera (for Front)
ComponentsCOMPONENTS ILLUSTRATION *1 FRONT TELEVISION CAMERA ASSEMBLY - - RemovalREMOVAL PROCEDURE 1. PRECAUTION Click here 2. REMOVE FRONT BUMPER COVER (a) for Sport Package: Click here (b) except Sport Package: Click here 3. REMOVE FRONT TELEVISION CAMERA ASSEMBLY (a) Disco
Torque Sensor Zero Point Adjustment Undone (C1515,C1516)
DESCRIPTION These DTCs do not indicate a malfunction. The power steering ECU assembly stores C1515 when it determines that torque sensor zero point calibration has not been performed. The power steering ECU assembly stores C1516 when it determines that torque sensor zero point calibration has not co
© 2016-2026 Copyright www.lexunx.com
