Lexus NX: Disassembly
DISASSEMBLY
PROCEDURE
1. REMOVE MILLIMETER WAVE RADAR SENSOR ASSEMBLY
Click here .gif)
2. REMOVE FRONT TELEVISION CAMERA ASSEMBLY (w/ Panoramic View Monitor System)
Click here
3. REMOVE FRONT CENTER ULTRASONIC SENSOR (w/ Intuitive Parking Assist System)
Click here
4. REMOVE FRONT BUMPER EXTENSION MOUNTING BRACKET
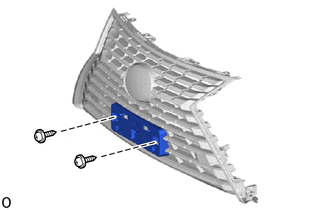
(a) Remove the 2 screws and front bumper extension mounting bracket.
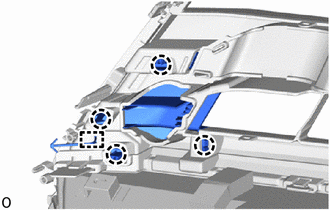
5. REMOVE FRONT BUMPER HOLE COVER LH
| (a) Detach the 4 claws and guide and remove the front bumper hole cover LH. |
|
6. REMOVE FRONT BUMPER HOLE COVER RH
HINT:
Use the same procedure described for the LH side.
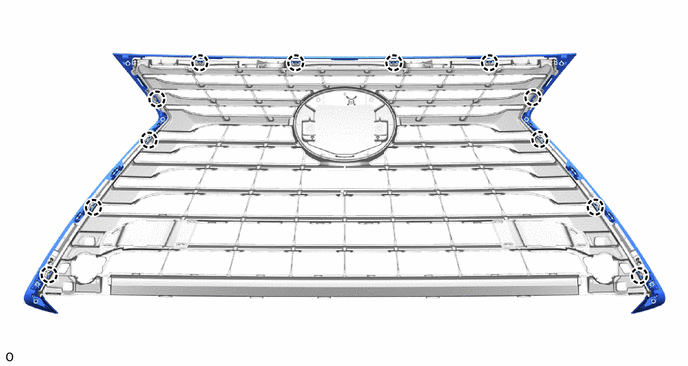
7. REMOVE RADIATOR GRILLE MOULDING
(a) Detach the 12 claws and remove the radiator grille moulding.
8. REMOVE RADIATOR GRILLE
9. REMOVE RADIATOR GRILLE EMBLEM
| (a) Remove the 2 screws. |
|
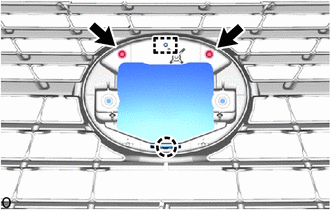
(b) Detach the claw and guide and remove the radiator grille emblem.
10. REMOVE NUT
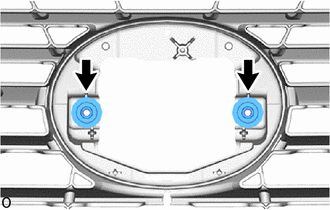
(a) Remove the 2 nuts.
READ NEXT:
 Reassembly
REASSEMBLY PROCEDURE 1. INSTALL NUT (a) Install the 2 nuts. 2. INSTALL RADIATOR GRILLE EMBLEM (a) Attach the claw and guide to install the radiator grille emblem. (b) Ins
Installation
INSTALLATION PROCEDURE 1. INSTALL RADIATOR GRILLE SUB-ASSEMBLY (a) Attach the 15 claws and 2 guides to install the radiator grille sub-assembly. (b) Install the 2 outside moulding retainers. (c) Insta
SEE MORE:
Installation
INSTALLATION PROCEDURE 1. INSTALL SLIDING ROOF HOUSING SUB-ASSEMBLY (a) Temporarily install the sliding roof housing sub-assembly with the 8 bolts and 8 nuts. (b) Tighten the nuts in the order indicated in the illustration. Torque: 8.0 N·m {82 kgf·cm, 71 in·lbf} (c) Insert the sliding roof drai
Installation
INSTALLATION PROCEDURE 1. INSTALL HEATER ACCESSORY ASSEMBLY (a) Connect the heater water inlet hose A with the paint mark (Blue) facing up and attach the clip within the area shown in the illustration. NOTICE: Do not apply excessive force to the heater water inlet hose A. *a View A
