Lexus NX: High Mounted Stop Light Assembly
Components
COMPONENTS
ILLUSTRATION
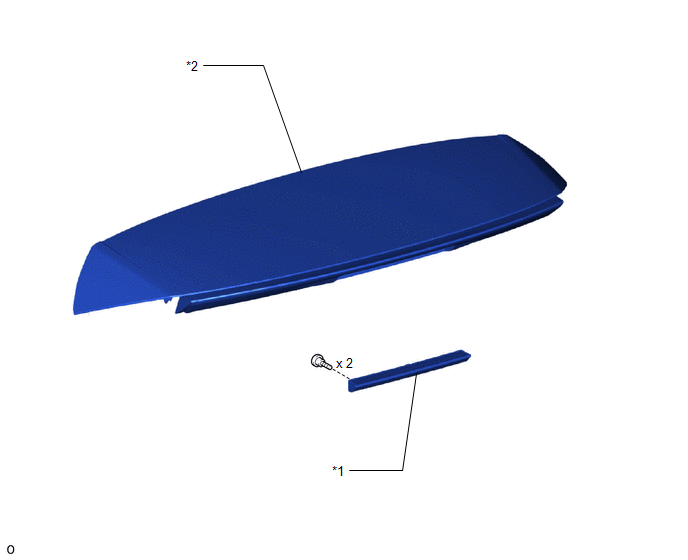
| *1 | CENTER STOP LIGHT ASSEMBLY | *2 | REAR SPOILER ASSEMBLY |
Removal
REMOVAL
PROCEDURE
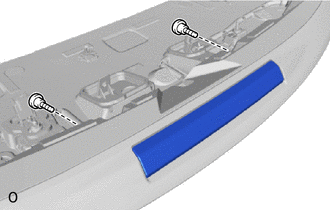
1. REMOVE REAR SPOILER ASSEMBLY
Click here .gif)
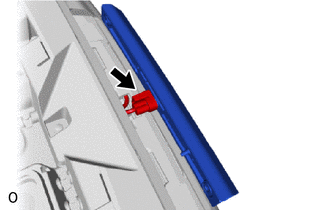
2. REMOVE CENTER STOP LIGHT ASSEMBLY
| (a) Remove the 2 screws and center stop light assembly. |
|
| (b) Disconnect the connector. |
|
Inspection
INSPECTION
PROCEDURE
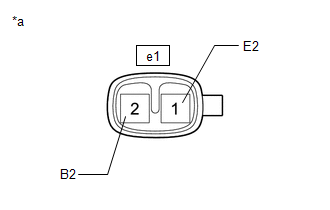
1. INSPECT CENTER STOP LIGHT ASSEMBLY
| (a) Apply auxiliary battery voltage to the connector and check the light illumination condition. OK:
If the result is not as specified, replace the center stop light assembly. |
|
Installation
INSTALLATION
PROCEDURE
1. INSTALL CENTER STOP LIGHT ASSEMBLY
(a) Connect the connector.
(b) Install the center stop light assembly with the 2 screws.
2. INSTALL REAR SPOILER ASSEMBLY
Click here .gif)
3. INSPECT CENTER STOP LIGHT
(a) Depress the brake pedal and check that the center stop light illuminates.
READ NEXT:
 Components
COMPONENTS ILLUSTRATION *A w/o Power Back Door System *B w/ Power Back Door System *1 BACK DOOR FINISH COVER LH *2 BACK DOOR FINISH COVER RH *3 BACK DOOR LOCK COVER *4 BA
Removal
REMOVAL CAUTION / NOTICE / HINT HINT:
Use the same procedure for the RH and LH sides.
The procedure described below is for the LH side.
PROCEDURE 1. REMOVE CENTER BACK DOOR GARNISH Click here
SEE MORE:
Brake Control Warning Light Remains ON
DESCRIPTION The skid control ECU (brake booster with master cylinder assembly) is connected to the combination meter assembly via CAN communication. If the skid control ECU stores a DTC, the brake warning light / yellow (minor malfunction) comes on in the combination meter assembly. WIRING DIAGRAM
Data List / Active Test
DATA LIST / ACTIVE TEST READ DATA LIST HINT: Using the Techstream to read the Data List allows the values or states of switches, sensors, actuators and other items to be read without removing any parts. This non-intrusive inspection can be very useful because intermittent conditions or signals may b
