
Lexus NX: Inspection
INSPECTION
PROCEDURE
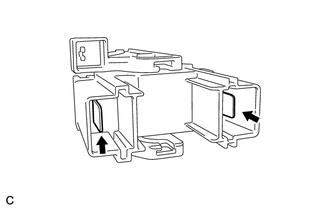
1. INSPECT SERVICE PLUG GRIP
| (a) Measure the resistance according to the value(s) in the table below. Standard Resistance:
If the result is not as specified, replace the service plug grip. |
|
READ NEXT:
 Installation
INSTALLATION PROCEDURE 1. INSTALL SERVICE PLUG GRIP CAUTION: Wear insulating gloves. NOTICE: Before connecting the service plug, check that no parts and tools remain and that the high voltage terminal
Sub Radiator
RemovalREMOVAL PROCEDURE 1. REMOVE NO. 1 ENGINE UNDER COVER ASSEMBLY Click here 2. DRAIN COOLANT (for Inverter Coolant) Click here 3. REMOVE UPPER RADIATOR SUPPORT SUB-ASSEMBLY Click here 4.
SEE MORE:
Installation
INSTALLATION CAUTION / NOTICE / HINT HINT:
Use the same procedure for the RH and LH sides.
The procedure described below is for the LH side.
PROCEDURE 1. INSTALL CLEARANCE LIGHT ASSEMBLY LH (a) Attach the 2 claws to install the clearance light assembly LH. (b) Install the 3 screws and clip.
Front Passenger Side Power Window does not Operate with Front Passenger Side Power Window Switch
DESCRIPTION When the power switch is on (IG), the front power window regulator motor assembly RH is operated by the power window regulator switch assembly. The front power window regulator motor assembly RH has motor, regulator and ECU functions. WIRING DIAGRAM CAUTION / NOTICE / HINT NOTICE:
Th
© 2016-2026 Copyright www.lexunx.com
