Lexus NX: Inspection
Lexus NX Service Manual / Audio & Visual & Telematics / Audio / Video / Quarter Trim Speaker / Inspection
INSPECTION
PROCEDURE
1. INSPECT REAR HEADER SPEAKER ASSEMBLY
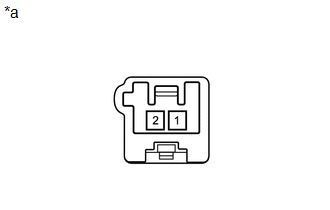
| (a) Measure the resistance according to the value(s) in the table below. Standard Resistance:
If the result is not as specified, replace the rear header speaker assembly. |
|
(b) When there is a malfunction such as noise from a speaker or no sound at all, replace the speaker with a new one and check that the malfunction disappears.
OK:
Malfunction disappears.
HINT:
- Connect the connectors to the rear header speaker assemblies.
- When there is a possibility that either the right or left rear header speaker assembly is defective, inspect by interchanging the right one with the left one.
- Perform the inspection above on both the LH and RH side.
READ NEXT:
 Installation
INSTALLATION PROCEDURE 1. INSTALL REAR HEADER SPEAKER ASSEMBLY NOTICE: Do not touch the cone part of the speaker. (a) Temporarily install the speaker by attaching the clip of the speaker to the veh
Components
COMPONENTS ILLUSTRATION *A for Type A *B for Type B *1 NO. 1 ANTENNA CORD SUB-ASSEMBLY *2 UPPER INSTRUMENT PANEL SUB-ASSEMBLY N*m (kgf*cm, ft.*lbf): Specified torque - -
SEE MORE:
Components
COMPONENTS ILLUSTRATION *A for 8 Inch Display *B for 10.3 Inch Display *1 CENTER INSTRUMENT CLUSTER FINISH PANEL ASSEMBLY *2 CONSOLE ARMREST ASSEMBLY *3 INSTRUMENT PANEL FINISH PLATE *4 INSTRUMENT SIDE PANEL LH *5 INSTRUMENT SIDE PANEL RH *6 LOWER NO. 1 INSTRU
Start Up Signal Circuit between Radio Receiver Assembly and Navigation ECU
DESCRIPTION This circuit includes the navigation ECU and radio and display receiver assembly. WIRING DIAGRAM PROCEDURE 1. CHECK HARNESS AND CONNECTOR (RADIO RECEIVER ASSEMBLY - NAVIGATION ECU) (a) Disconnect the I153 radio receiver assembly connector. (b) Disconnect the I173 navigation ECU
© 2016-2026 Copyright www.lexunx.com
