Lexus NX: Removal
REMOVAL
CAUTION / NOTICE / HINT
HINT:
- Use the same procedure for the RH and LH sides.
- The procedure described below is for the LH side.
PROCEDURE
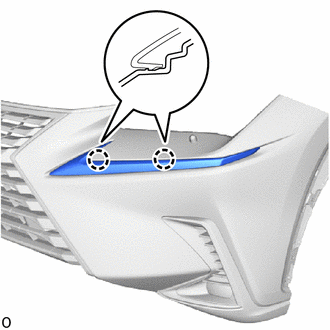
1. REMOVE FRONT BUMPER ASSEMBLY
Click here .gif)
2. REMOVE CLEARANCE LIGHT ASSEMBLY LH
(a) w/ Headlight Cleaner System:
| (1) Detach the claw and disconnect the headlight cleaner hose. |
|
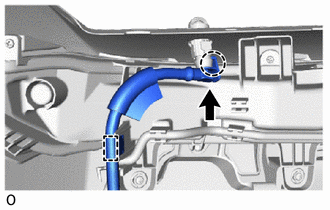
(2) Detach the hose clamp.
| (b) Detach the 2 wire harness clamps. |
|
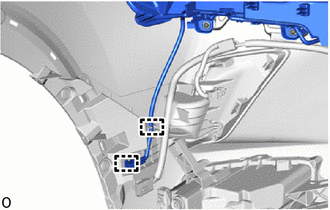
| (c) Remove the clip and 3 screws. |
|
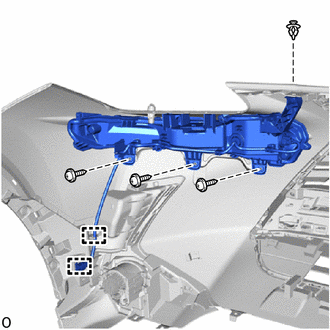
| (d) Detach the 2 claws and remove the clearance light assembly LH. |
|
READ NEXT:
 Disassembly
DISASSEMBLY CAUTION / NOTICE / HINT HINT:
Use the same procedure for the RH and LH sides.
The procedure listed below is for the LH side.
PROCEDURE 1. REMOVE FRONT TURN SIGNAL LIGHT BULB (a) Tu
Inspection
INSPECTION PROCEDURE 1. INSPECT CLEARANCE LIGHT ASSEMBLY LH (a) Apply battery voltage to the connector and check the light illumination condition. OK: Condition Specified Condition Batter
Reassembly
REASSEMBLY CAUTION / NOTICE / HINT HINT:
Use the same procedure for the RH and LH sides.
The procedure listed below is for the LH side.
PROCEDURE 1. INSTALL FRONT TURN SIGNAL LIGHT BULB (a) In
SEE MORE:
Internal Control Module Software Incompatibility Not Programmed (U030051,U030057)
DESCRIPTION
When the forward recognition camera is unable to determine the vehicle information from the vehicle information sent from the hybrid vehicle control ECU, the forward recognition camera outputs U030051.
When the vehicle information sent from the hybrid vehicle control ECU does not ma
Removal
REMOVAL PROCEDURE 1. REMOVE REAR SEAT ASSEMBLY (for Manual Seat) Click here 2. REMOVE REAR SEAT ASSEMBLY (for Power Seat) Click here 3. REMOVE TONNEAU COVER ASSEMBLY Click here 4. REMOVE DECK BOARD ASSEMBLY Click here 5. REMOVE NO. 2 DECK BOARD SUB-ASSEMBLY Click here 6. REMOVE NO. 3 DECK
© 2016-2026 Copyright www.lexunx.com
