
Lexus NX: Removal
REMOVAL
PROCEDURE
1. REMOVE DOOR SCUFF PLATE ASSEMBLY LH
Click here .gif)
2. REMOVE COWL SIDE TRIM BOARD LH
Click here
3. REMOVE NO. 1 INSTRUMENT PANEL UNDER COVER SUB-ASSEMBLY
Click here
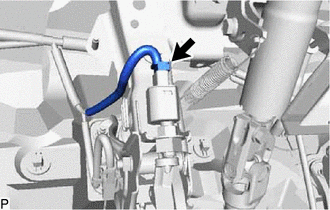
4. REMOVE STOP LIGHT SWITCH ASSEMBLY
| (a) Disconnect the connector. |
|
| (b) Loosen the lock nut. |
|
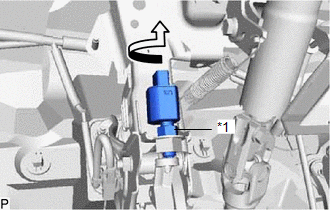
(c) Turn the stop light switch assembly counterclockwise and remove it.
READ NEXT:
 Installation
INSTALLATION PROCEDURE 1. INSTALL STOP LIGHT SWITCH ASSEMBLY (a) Turn the stop light switch assembly in the clockwise direction until it reaches the standard shaft protrusion amount and temporarily
SEE MORE:
Immobiliser System does not Operate Properly
DESCRIPTION The immobiliser system compares the ID code that is registered in the certification ECU (smart key ECU assembly) with the ID code of the transponder chip that is embedded in the electrical key transmitter sub-assembly. WIRING DIAGRAM Click here CAUTION / NOTICE / HINT NOTICE:
When
Dtc Check / Clear
DTC CHECK / CLEAR CHECK DTC (a) Connect the Techstream to the DLC3. (b) Turn the power switch on (IG). (c) Turn the Techstream on. (d) Enter the following menus: Body Electrical / Air Conditioner / Trouble Codes. Body Electrical > Air Conditioner > Trouble Codes (e) Check for DTCs. CLEAR DTC (
© 2016-2026 Copyright www.lexunx.com
