Lexus NX: Removal
REMOVAL
PROCEDURE
1. REMOVE MAP LIGHT ASSEMBLY (PERSONAL LIGHT)
| (a) Using moulding remover D, detach the 4 clips. |
|
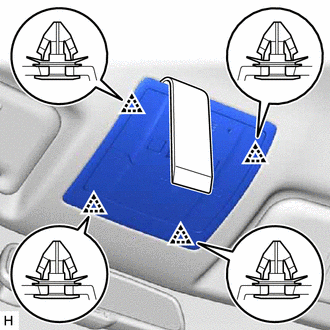
(b) Disconnect the connectors and remove the map light assembly (personal light).
READ NEXT:
 Disassembly
DISASSEMBLY PROCEDURE 1. REMOVE MAP LIGHT SUB-ASSEMBLY (a) Using a screwdriver, detach the 17 claws and remove the map light sub-assembly. HINT: Tape the screwdriver tip before use. *1
Inspection
INSPECTION PROCEDURE 1. INSPECT MAP LIGHT ASSEMBLY (PERSONAL LIGHT) (a) Inspect the front map light. (1) Apply battery voltage to the connector and check the light illumination condition. OK: M
Reassembly
REASSEMBLY PROCEDURE 1. INSTALL MAP LIGHT SUB-ASSEMBLY (a) Attach the 17 claws to install the map light sub-assembly.
SEE MORE:
Remote Touch
Remote Touch
The Remote Touch can be used to
operate the navigation/multimedia
system display Owners of models
equipped with a navigation system
should refer to the "NAVIGATION
AND MULTIMEDIA SYSTEM
OWNER'S MANUAL".
Remote Touch operation
■ Switches
10.3-inch display model
"MAP" bu
On-vehicle Inspection
ON-VEHICLE INSPECTION PROCEDURE 1. INSPECT SHIFT LEVER ASSEMBLY (a) Inspect shift lock operation. (1) Move the shift lever to P. (2) Turn the power switch off. (3) Check that the shift lever cannot be moved from P to any other position. (4) Turn the power switch on (READY), depress the brake pedal,
© 2016-2026 Copyright www.lexunx.com
