Lexus NX: Removal
REMOVAL
PROCEDURE
1. REMOVE FRONT DOOR TRIM COVER LH
Click here .gif)
2. REMOVE FRONT DOOR INSIDE HANDLE BEZEL PLUG LH
Click here
3. REMOVE POWER WINDOW REGULATOR MASTER SWITCH ASSEMBLY WITH FRONT DOOR ARMREST BASE PANEL
Click here
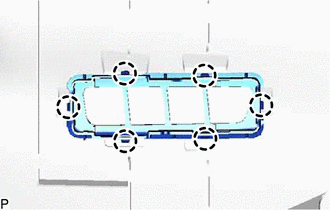
4. REMOVE FRONT DOOR TRIM BOARD SUB-ASSEMBLY LH
Click here
5. REMOVE SEAT MEMORY SWITCH
| (a) Using a screwdriver, detach the 4 claws to remove the seat memory switch. HINT: Tape the screwdriver tip before use. |
|

6. REMOVE FRONT SEAT SLIDE SWITCH BEZEL
| (a) Detach the 6 claws to remove the front seat slide switch bezel. |
|
READ NEXT:
 Inspection
INSPECTION PROCEDURE 1. INSPECT SEAT MEMORY SWITCH (a) Measure the resistance according to the value(s) in the table below. Standard Resistance: Tester Connection Switch Condition Specified
Installation
INSTALLATION PROCEDURE 1. INSTALL FRONT SEAT SLIDE SWITCH BEZEL (a) Attach the 6 claws to install the front seat slide switch bezel. 2. INSTALL SEAT MEMORY SWITCH (a) Attach the 4 claws to install the
SEE MORE:
Drive Motor "A" Temperature Sensor Circuit Low (P0A2C-247,P0A2D-249)
DESCRIPTION Refer to the description for DTC P0A2B-250. Click here DTC No. Detection Item DTC Detection Condition Trouble Area MIL Warning Indicate P0A2C-247 Drive Motor "A" Temperature Sensor Circuit Low Line short or short to ground in the motor temperature sensor circuit (1
Blower Motor Circuit
DESCRIPTION The blower with fan motor sub-assembly is operated by signals from the air conditioning amplifier assembly. Blower motor speed signals are transmitted in accordance with changes in the duty ratio. WIRING DIAGRAM CAUTION / NOTICE / HINT NOTICE:
Inspect the fuses for circuits related t
© 2016-2026 Copyright www.lexunx.com
