
Lexus NX: Components
Lexus NX Service Manual / Engine & Hybrid System / Cruise Control / Cruise Control Main Switch / Components
COMPONENTS
ILLUSTRATION
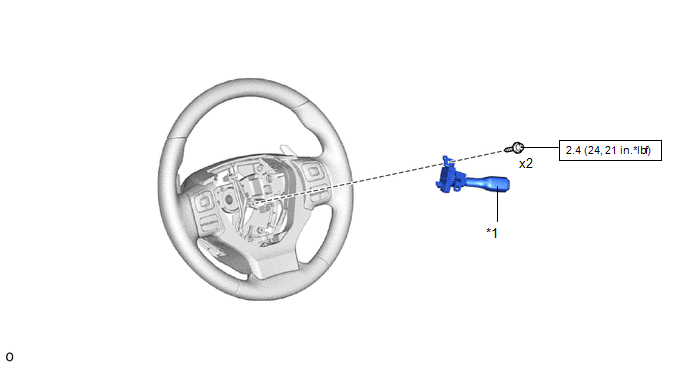
| *1 | CRUISE CONTROL MAIN SWITCH | - | - |
.png) | N*m (kgf*cm, ft.*lbf): Specified torque | - | - |
READ NEXT:
 Removal
REMOVAL PROCEDURE 1. REMOVE HORN BUTTON ASSEMBLY Click here 2. REMOVE CRUISE CONTROL MAIN SWITCH (a) Remove the 2 screws. *a Guide (b) Detach the guide. (c) Disconnect t
Inspection
INSPECTION PROCEDURE 1. INSPECT CRUISE CONTROL MAIN SWITCH (a) w/o Dynamic Radar Cruise Control System: (1) Measure the resistance according to the value(s) in the table below. *a Component with
Installation
INSTALLATION PROCEDURE 1. INSTALL CRUISE CONTROL MAIN SWITCH (a) Pass the wire harness under the rib as shown in the illustration. *1 Wire Harness *a Rib *b Guide Connector
SEE MORE:
Switch Lights of Remote Touch Always Illuminate or cannot be Controlled Using Rheostat
DESCRIPTION Power is supplied to the remote touch illumination when the light control switch is in the tail or head position. HINT:
When the remote touch is in self check mode, the switch illumination on the remote touch may remain on.
If any illumination controlled by the rheostat switch has a
Problem Symptoms Table
PROBLEM SYMPTOMS TABLE NOTICE: If the main body ECU (multiplex network body ECU) is replaced, refer to Registration. Click here HINT:
Use the table below to help determine the cause of problem symptoms. If multiple suspected areas are listed, the potential causes of the symptoms are listed in
© 2016-2026 Copyright www.lexunx.com
