Lexus NX: Components
COMPONENTS
ILLUSTRATION
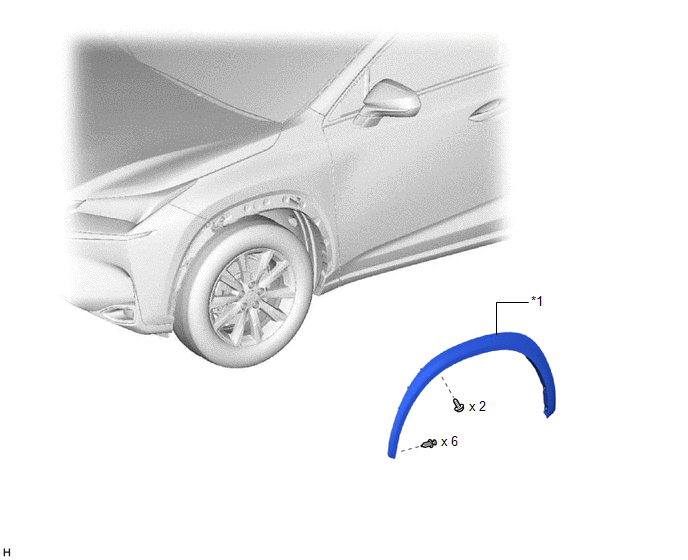
| *1 | FRONT FENDER MOULDING SUB-ASSEMBLY LH | - | - |
ILLUSTRATION
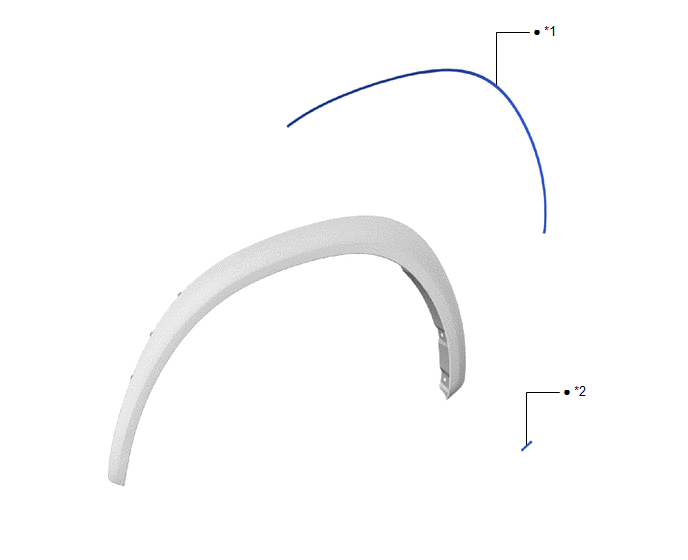
| *1 | NO. 1 MOULDING TAPE | *2 | NO. 2 MOULDING TAPE |
| ● | Non-reusable part | - | - |
READ NEXT:
 Removal
REMOVAL CAUTION / NOTICE / HINT HINT:
Use the same procedure for the RH and LH sides.
The procedure listed below is for the LH side.
PROCEDURE 1. REMOVE FRONT FENDER MOULDING SUB-ASSEMBLY LH H
Disassembly
DISASSEMBLY CAUTION / NOTICE / HINT HINT:
Use the same procedure for the RH and LH sides.
The procedure listed below is for the LH side.
PROCEDURE 1. REMOVE NO. 1 MOULDING TAPE (a) Remove the
Reassembly
REASSEMBLY CAUTION / NOTICE / HINT HINT:
Use the same procedure for the RH and LH sides.
The procedure listed below is for the LH side.
PROCEDURE 1. INSTALL NO. 1 MOULDING TAPE (a) Clean the N
SEE MORE:
Customize Parameters
CUSTOMIZE PARAMETERS CUSTOMIZE POWER DOOR LOCK CONTROL SYSTEM HINT: The following items can be customized. NOTICE:
When the customer requests a change in a function, first make sure that the function can be customized.
Be sure to make a note of the current settings before customizing.
When tr
Data List / Active Test
DATA LIST / ACTIVE TEST DATA LIST NOTICE: In the table below, the values listed under "Normal Condition" are reference values. Do not depend solely on these reference values when deciding whether a part is faulty or not. HINT: Using the Techstream to read the Data List allows the values or states of
© 2016-2026 Copyright www.lexunx.com
