
Lexus NX: Components
Lexus NX Service Manual / Vehicle Exterior / Lighting (ext) / Automatic Light Control Sensor / Components
COMPONENTS
ILLUSTRATION
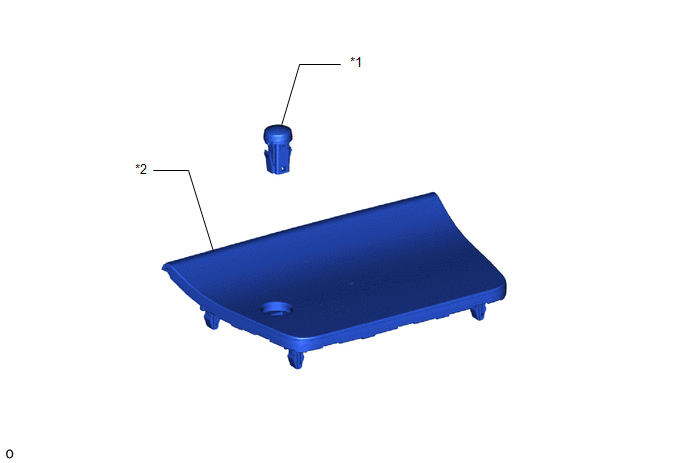
| *1 | AUTOMATIC LIGHT CONTROL SENSOR | *2 | NO. 1 SPEAKER OPENING COVER ASSEMBLY |
READ NEXT:
 Removal
REMOVAL PROCEDURE 1. REMOVE NO. 1 SPEAKER OPENING COVER ASSEMBLY Click here 2. REMOVE AUTOMATIC LIGHT CONTROL SENSOR (a) Detach the 2 claws and remove the automatic light control sensor.
Inspection
INSPECTION PROCEDURE 1. INSPECT AUTOMATIC LIGHT CONTROL SENSOR (a) Disconnect the automatic light control sensor connector. *a Front view of wire harness connector (to Automatic Ligh
Installation
INSTALLATION PROCEDURE 1. INSTALL AUTOMATIC LIGHT CONTROL SENSOR (a) Attach the 2 claws to install the automatic light control sensor. 2. INSTALL NO. 1 SPEAKER OPENING COVER ASSEMBLY Click here 3.
SEE MORE:
Status Signal Circuit
DESCRIPTION This circuit sends a charging stop signal from the certification ECU (smart key ECU assembly) to the mobile wireless charger cradle assembly. Based on this signal, the wireless charging system stops the charging operation. HINT: The charging frequency of the wireless charging system over
On-vehicle Inspection
ON-VEHICLE INSPECTION CAUTION / NOTICE / HINT CAUTION: Be sure to correctly follow the removal and installation procedures for the front seat outer belt assembly. PROCEDURE 1. INSPECT FRONT SEAT OUTER BELT ASSEMBLY (for Vehicle not Involved in Collision) (a) Perform a diagnostic system check. Click
© 2016-2026 Copyright www.lexunx.com
