Lexus NX: Components
COMPONENTS
ILLUSTRATION
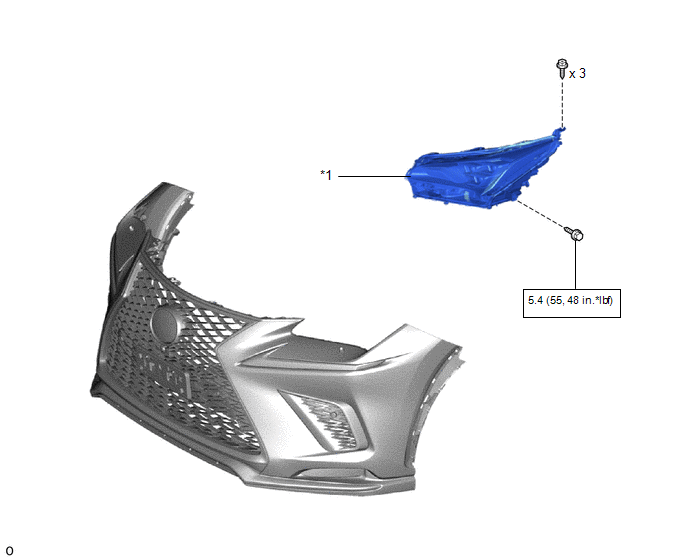
| *1 | HEADLIGHT ASSEMBLY LH | - | - |
.png) | N*m (kgf*cm, ft.*lbf): Specified torque | - | - |
ILLUSTRATION
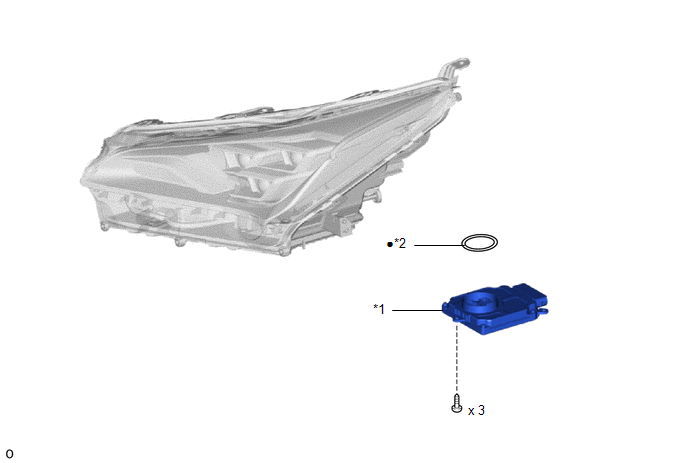
| *1 | HEADLIGHT ECU SUB-ASSEMBLY LH | *2 | HEADLIGHT GASKET |
| ● | Non-reusable part | - | - |
ILLUSTRATION
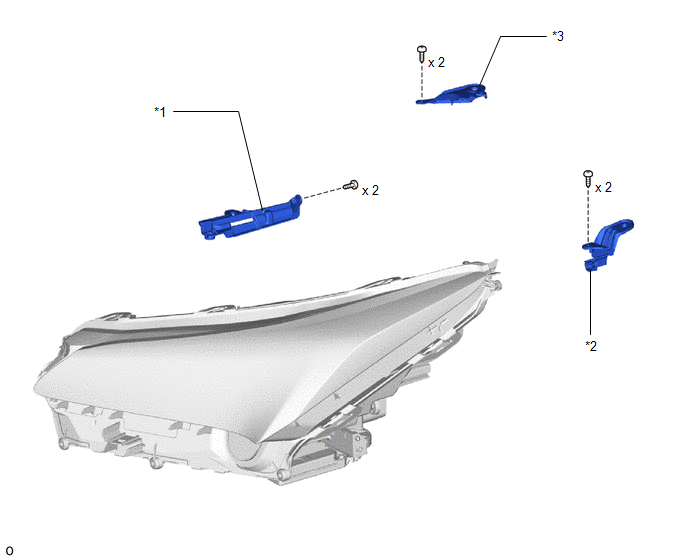
| *1 | LOWER HEADLIGHT PROTECTOR RETAINER LH | *2 | UPPER HEADLIGHT PROTECTOR RETAINER LH |
| *3 | UPPER HEADLIGHT PROTECTOR RETAINER RH | - | - |
READ NEXT:
 Removal
REMOVAL CAUTION / NOTICE / HINT HINT:
Use the same procedure for the RH and LH sides.
The procedure described below is for the LH side.
PROCEDURE 1. REMOVE FRONT BUMPER ASSEMBLY (a) except Spo
Disassembly
DISASSEMBLY PROCEDURE 1. PRECAUTION NOTICE:
Be sure to read Precaution thoroughly before servicing.
Click here
Do not reuse parts which have reduced fastening ability due to thread damage.
Wh
Adjustment
ADJUSTMENT CAUTION / NOTICE / HINT HINT:
Use the same procedure for the RH and LH sides.
The procedure listed below is for the LH side.
It is possible that a headlight assembly is incorrectly i
SEE MORE:
Precaution
PRECAUTION NOTICE: When disassembling the rear combination light assembly, use static electricity countermeasures SST (desktop antistatic mat set) and observe all precautions to prevent damage to the system by electrostatic discharge (ESD). STATIC ELECTRICITY COUNTERMEASURES SST SST:Desktop antistat
Left Headlight ECU Variation Error (B2456)
DESCRIPTION This DTC is output when a headlight ECU sub-assembly LH that is incompatible with the vehicle is installed. The headlight ECU sub-assembly LH outputs DTC B2456. DTC No. Detection Item DTC Detection Condition Trouble Area B2456 Left Headlight ECU Variation Error Headlight
© 2016-2026 Copyright www.lexunx.com
