Lexus NX: Components
COMPONENTS
ILLUSTRATION

| *1 | HEADLIGHT ASSEMBLY LH | - | - |
.png) | N*m (kgf*cm, ft.*lbf): Specified torque | - | - |
ILLUSTRATION
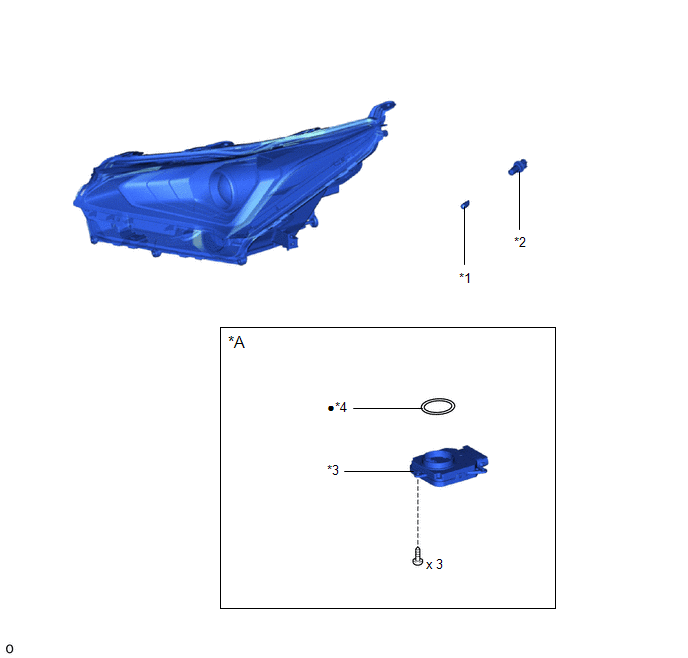
| *A | w/ Headlight ECU | - | - |
| *1 | FRONT SIDE MAKER LIGHT BULB | *2 | FRONT SIDE MARKER LIGHT SOCKET |
| *3 | HEADLIGHT ECU SUB-ASSEMBLY LH | *4 | HEADLIGHT GASKET |
| ● | Non-reusable part | - | - |
ILLUSTRATION
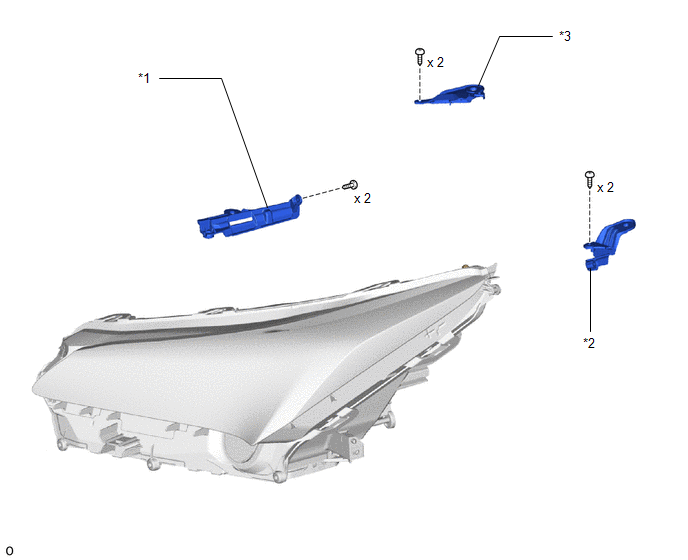
| *1 | LOWER HEADLIGHT PROTECTOR RETAINER LH | *2 | UPPER HEADLIGHT PROTECTOR RETAINER LH |
| *3 | UPPER HEADLIGHT PROTECTOR RETAINER RH | - | - |
READ NEXT:
 Removal
REMOVAL CAUTION / NOTICE / HINT HINT:
Use the same procedure for the RH and LH sides.
The procedure described below is for the LH side.
PROCEDURE 1. REMOVE FRONT BUMPER ASSEMBLY (a) except Spo
Disassembly
DISASSEMBLY PROCEDURE 1. PRECAUTION NOTICE:
Be sure to read Precaution thoroughly before servicing.
Click here
Do not reuse parts which have reduced fastening ability due to thread damage.
Wh
Inspection
INSPECTION PROCEDURE 1. INSPECT HEADLIGHT ASSEMBLY LH (a) Apply battery voltage to the connector and check the light illumination condition. OK: Battery Connection Specified Condition Pos
SEE MORE:
Rear Television Camera Communication Stop Mode
DESCRIPTION Detection Item Symptom Trouble Area Rear Television Camera Communication Stop Mode Any of the following conditions are met:
Communication stop for "Parking Assist Monitor System / Rear Camera" is indicated on the "Communication Bus Check" screen of the Techstream.
Click h
Installation
INSTALLATION PROCEDURE 1. INSTALL INTEGRATION CONTROL AND PANEL ASSEMBLY (BRAKE HOLD SWITCH) (a) Install the integration control and panel assembly (brake hold switch) to the upper rear console panel sub-assembly with the 2 screws. HINT: The locations labeled A in the illustration are tightened t
© 2016-2026 Copyright www.lexunx.com
