
Lexus NX: Components
COMPONENTS
ILLUSTRATION
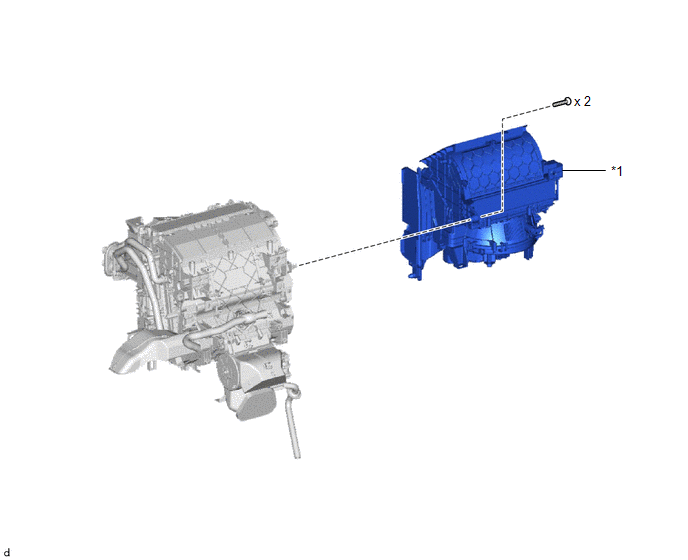
| *1 | BLOWER ASSEMBLY | - | - |
ILLUSTRATION
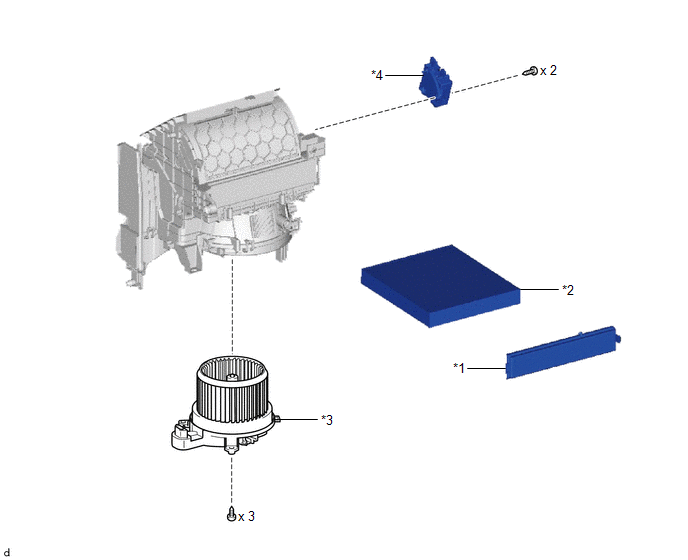
| *1 | AIR FILTER CASE | *2 | AIR REFINER ELEMENT |
| *3 | BLOWER WITH FAN MOTOR SUB-ASSEMBLY | *4 | NO. 1 BLOWER DAMPER SERVO SUB-ASSEMBLY |
READ NEXT:
 Removal
REMOVAL PROCEDURE 1. REMOVE AIR CONDITIONING UNIT ASSEMBLY Click here 2. REMOVE BLOWER ASSEMBLY (a) Disconnect the No. 1 blower damper servo sub-assembly connector. (b) Detach the 3
Disassembly
DISASSEMBLY PROCEDURE 1. REMOVE AIR FILTER CASE (a) Detach the claw and guide and remove the air filter case. 2. REMOVE AIR REFINER ELEMENT (a) Remove the air refiner element.
Reassembly
REASSEMBLY PROCEDURE 1. INSTALL NO. 1 BLOWER DAMPER SERVO SUB-ASSEMBLY (a) Install the link of the No. 1 blower damper servo sub-assembly to the link of the blower assembly as shown in the illustra
SEE MORE:
Data List / Active Test
DATA LIST / ACTIVE TEST NOTICE: In the table below, the values listed under "Normal Condition" are reference values. Do not depend solely on these reference values when deciding whether a part is faulty or not. HINT: Using the Techstream to read the Data List allows the values or states of switches,
Parts Location
PARTS LOCATION ILLUSTRATION *1 OUTER REAR VIEW MIRROR ASSEMBLY LH *2 OUTER REAR VIEW MIRROR ASSEMBLY RH *3 OUTER MIRROR LH *4 OUTER MIRROR RH *5 NO. 2 ENGINE ROOM RELAY BLOCK - DEF RELAY - ECU-B NO.2 FUSE - DEF FUSE - MIR HTR FUSE - MIRROR FUSE *6 FUSE BLOCK ASSEMBLY -
© 2016-2026 Copyright www.lexunx.com
