Lexus NX: Components
Lexus NX Service Manual / Vehicle Interior / Heating / Air Conditioning / Humidity Sensor / Components
COMPONENTS
ILLUSTRATION
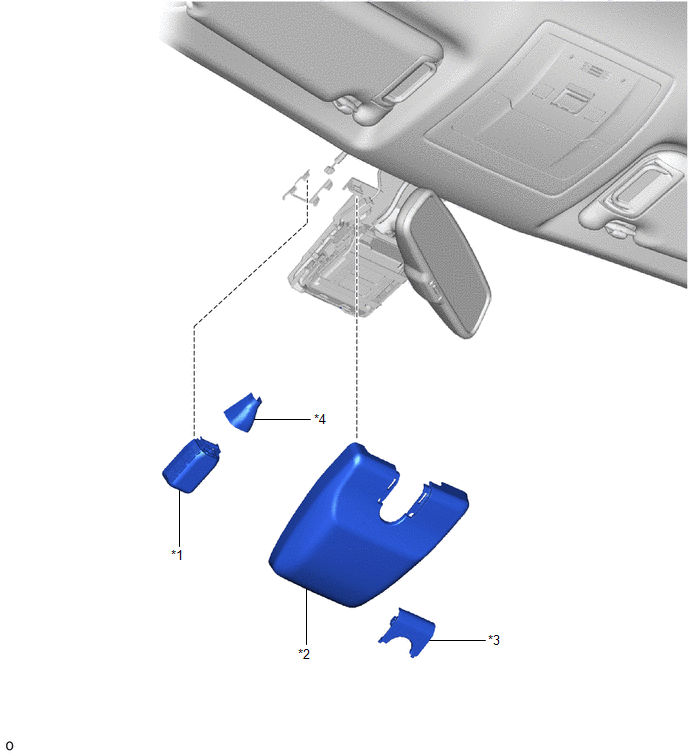
| *1 | AIR CONDITIONING THERMISTOR ASSEMBLY (HUMIDITY SENSOR) | *2 | NO. 1 FORWARD RECOGNITION COVER |
| *3 | NO. 2 FORWARD RECOGNITION COVER | *4 | PROTECTOR |
READ NEXT:
 Removal
REMOVAL PROCEDURE 1. REMOVE NO. 2 FORWARD RECOGNITION COVER Click here 2. REMOVE NO. 1 FORWARD RECOGNITION COVER Click here 3. REMOVE PROTECTOR (a) Detach the 2 claws and remove the protector.
Inspection
INSPECTION PROCEDURE 1. INSPECT AIR CONDITIONING THERMISTOR ASSEMBLY (HUMIDITY SENSOR) (a) for Glass temperature sensor: (1) Measure the resistance according to the value(s) in the table below. *a
Installation
INSTALLATION PROCEDURE 1. INSTALL AIR CONDITIONING THERMISTOR ASSEMBLY (HUMIDITY SENSOR) *1 Stopper *2 Bracket (a) Attach the 2 brackets, and carefully install the air conditioning ther
SEE MORE:
Installation
INSTALLATION PROCEDURE 1. INSTALL FRONT STABILIZER BAR Click here 2. INSTALL FRONT SUSPENSION MEMBER BRACE Click here 3. TEMPORARILY INSTALL FRONT LOWER NO. 1 SUSPENSION ARM SUB-ASSEMBLY LH (a) Temporarily install the front lower No. 1 suspension arm sub-assembly LH to the front suspension cross
Lost Communication with Multi-axis Acceleration Sensor Module Missing Message (U012587,U012987,U014087,U029387)
DESCRIPTION DTC No. Detection Item DTC Detection Condition Trouble Area DTC Output from U012587 Lost Communication with Multi-axis Acceleration Sensor Module Missing Message Communication stop occurs between the forward recognition camera and airbag ECU assembly continuously for 5
© 2016-2026 Copyright www.lexunx.com
