Lexus NX: Disassembly
DISASSEMBLY
PROCEDURE
1. REMOVE MILLIMETER WAVE RADAR SENSOR ASSEMBLY
Click here .gif)
2. REMOVE FRONT TELEVISION CAMERA ASSEMBLY (w/ Panoramic View Monitor System)
Click here
3. REMOVE FRONT CENTER ULTRASONIC SENSOR (w/ Intuitive Parking Assist System)
Click here
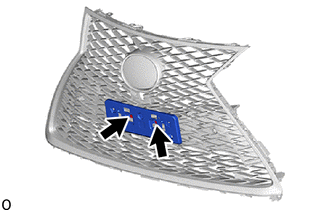
4. REMOVE FRONT BUMPER EXTENSION MOUNTING BRACKET
| (a) Remove the 2 screws and front bumper extension mounting bracket. |
|
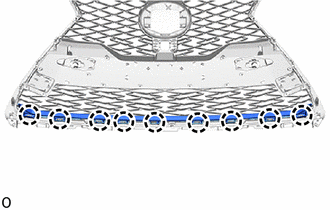
5. REMOVE LOWER NO. 1 RADIATOR GRILLE
| (a) Detach the 9 claws and remove the lower No. 1 radiator grille. |
|
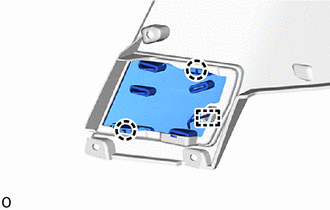
6. REMOVE FRONT BUMPER HOLE COVER LH
| (a) Detach the 2 claws and guide and remove the front bumper hole cover LH. |
|
7. REMOVE FRONT BUMPER HOLE COVER RH
HINT:
Use the same procedure described for the LH side.
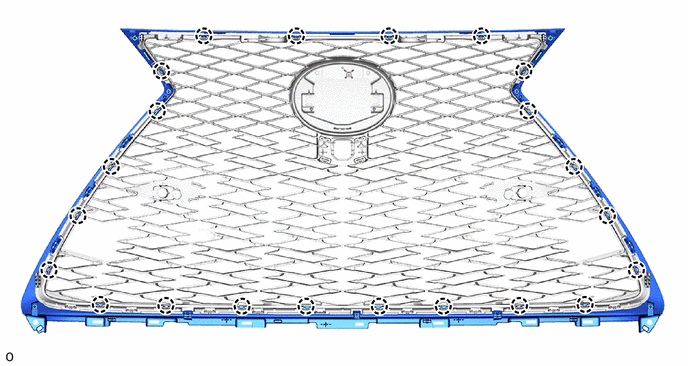
8. REMOVE RADIATOR GRILLE MOULDING
(a) Detach the 22 claws and remove the radiator grille moulding.
9. REMOVE RADIATOR GRILLE
10. REMOVE NO. 3 RADIATOR GRILLE GARNISH
| (a) Detach the 4 claws and remove the No. 3 radiator grille garnish. |
|
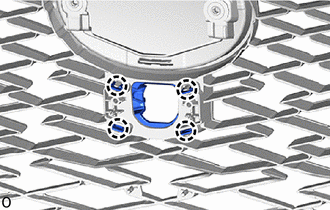
11. REMOVE RADIATOR GRILLE EMBLEM
| (a) Remove the 2 screws. |
|
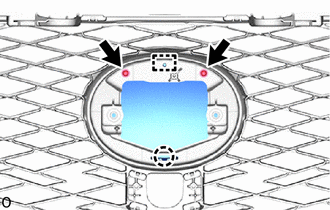
(b) Detach the claw and the guide and remove the radiator grille emblem.
12. REMOVE NUT
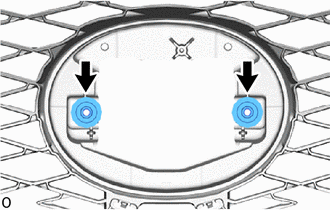
(a) Remove the 2 nuts.
READ NEXT:
 Reassembly
REASSEMBLY PROCEDURE 1. INSTALL NUT (a) Install the 2 nuts. 2. INSTALL RADIATOR GRILLE EMBLEM (a) Attach the claw and guide to install the radiator grille emblem. (b) Ins
Installation
INSTALLATION PROCEDURE 1. INSTALL RADIATOR GRILLE SUB-ASSEMBLY (a) Attach the 14 claws and the 4 guides to install the radiator grille sub-assembly. (b) Install the 2 outside moulding retainers. (c) I
SEE MORE:
Components
COMPONENTS ILLUSTRATION *1 NO. 1 AIR DUCT *2 QUICK HEATER ASSEMBLY ● Non-reusable part - -
Steering Angle Sensor Failure (C1626)
DESCRIPTION This DTC is stored if the parking assist ECU receives a signal via CAN communication from the steering sensor that indicates an internal malfunction. DTC No. Detection Item DTC Detection Condition Trouble Area C1626 Steering Angle Sensor Failure A fail flag is transmitte
