Lexus NX: Disassembly
DISASSEMBLY
PROCEDURE
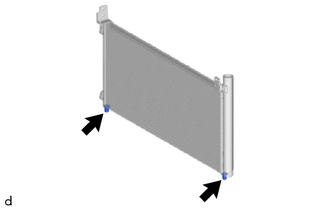
1. REMOVE NO. 1 COOLER CONDENSER CUSHION
| (a) Remove the 2 No. 1 cooler condenser cushions from the cooler condenser assembly. |
|
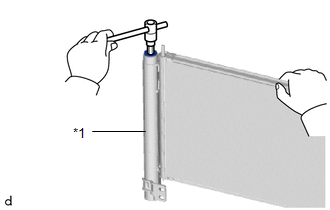
2. REMOVE COOLER DRYER
| (a) Using a 14 mm hexagon socket wrench, remove the cap from the modulator. |
|
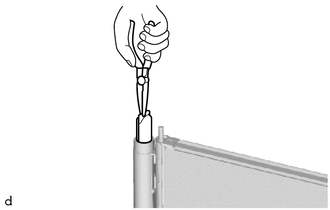
| (b) Using pliers, remove the cooler dryer from the modulator. |
|
READ NEXT:
 Reassembly
REASSEMBLY PROCEDURE 1. INSTALL COOLER DRYER (a) Using pliers, install a new cooler dryer to the modulator. *1 Modulator (b) Apply sufficient compressor oil to the O-ring
Installation
INSTALLATION PROCEDURE 1. INSTALL COOLER CONDENSER ASSEMBLY (a) Attach the 2 guides to install the cooler condenser assembly. NOTICE: Do not damage the cooler condenser assembly or radiator assembl
Cooler Expansion Valve
ComponentsCOMPONENTS ILLUSTRATION *1 AIR CONDITIONER TUBE AND ACCESSORY ASSEMBLY *2 COOLER EXPANSION VALVE *3 O-RING - - N*m (kgf*cm, ft.*lbf): Specified torque ● Non
SEE MORE:
Lost Communication with Main Body ECU (U0140,U0142,U0155,U0293,U1117)
DESCRIPTION These DTCs are stored when there is a CAN communication error between the hybrid vehicle control ECU, certification ECU (smart key ECU assembly), ECM, main body ECU (multiplex network body ECU) or combination meter assembly, and data from the option connector (bus buffer ECU) cannot be r
Replacement
REPLACEMENT CAUTION / NOTICE / HINT NOTICE:
When the brake pedal is first depressed after replacing the brake pads or pushing back the disc brake piston, DTC C1214 may be output. As there is no malfunction, clear the DTC.
While the auxiliary battery is connected, even if the power switch is off
© 2016-2026 Copyright www.lexunx.com
