Lexus NX: Fuel Tank Cap
Inspection
INSPECTION
PROCEDURE
1. INSPECT FUEL TANK CAP ASSEMBLY
(a) Visually check that the fuel tank cap assembly and fuel tank cap gasket are not deformed or damaged.
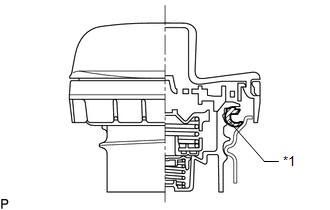
| *1 | Fuel Tank Cap Gasket |
If the result is not as specified, replace the fuel tank cap assembly or fuel tank cap gasket.
NOTICE:
Confirm that ID mark S is printed on the replacement fuel tank cap assembly.
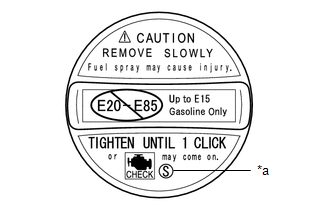
| *a | ID Mark |
READ NEXT:
 Pcv Valve
ComponentsCOMPONENTS ILLUSTRATION *1 PCV VALVE SUB-ASSEMBLY *2 NO. 2 PCV HOSE N*m (kgf*cm, ft.*lbf): Specified torque Toyota Genuine Adhesive 1324, Three Bond 1324 or equivalent
Purge Valve
ComponentsCOMPONENTS ILLUSTRATION *1 PURGE VSV *2 FUEL VAPOR FEED HOSE *3 NO. 2 FUEL VAPOR FEED HOSE - - RemovalREMOVAL PROCEDURE 1. REMOVE PURGE VSV (a) Disconnect the wir
SEE MORE:
Removal
REMOVAL CAUTION / NOTICE / HINT HINT:
Use the same procedure for the RH and LH sides.
The procedures listed below are for the LH side.
PROCEDURE 1. REMOVE FRONT DOOR LOWER OUTSIDE MOULDING SUB-ASSEMBLY LH HINT: When removing the front door lower outside moulding sub-assembly LH, heat the fro
12-volt battery
Location
The 12-volt battery is located in the left-hand
side of luggage compartment.
■Before recharging
When recharging, the 12-volt battery produces
hydrogen gas which is flammable
and explosive. Therefore, observe the following
precautions before recharging:
If recharging with the
© 2016-2026 Copyright www.lexunx.com
