Lexus NX: Components
Lexus NX Service Manual / Vehicle Exterior / Exterior Panels / Trim / Rear Door Outside Moulding / Components
COMPONENTS
ILLUSTRATION
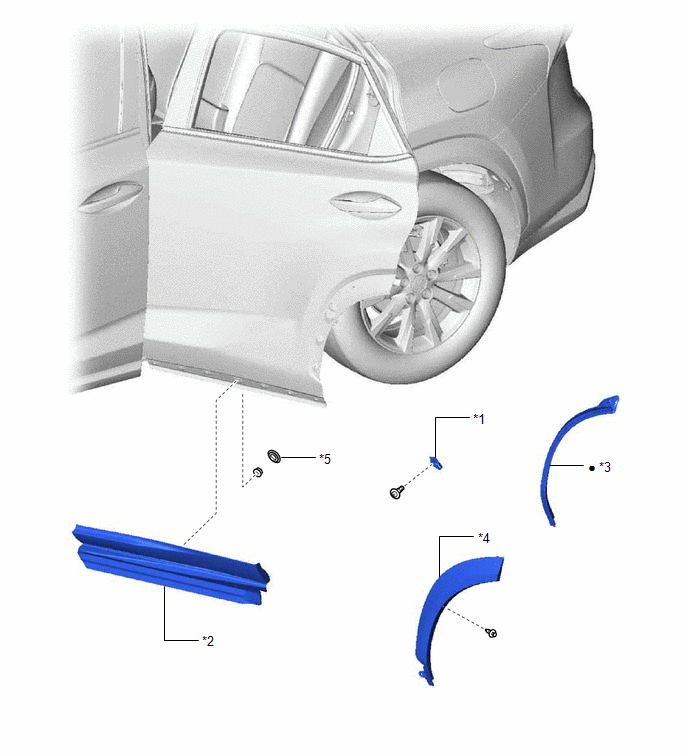
| *1 | OUTSIDE MOULDING RETAINER | *2 | REAR DOOR LOWER OUTSIDE MOULDING SUB-ASSEMBLY LH |
| *3 | REAR DOOR NO. 2 WEATHERSTRIP LH | *4 | REAR DOOR REAR UPPER OUTSIDE MOULDING LH |
| *5 | HOLE COVER | - | - |
| ● | Non-reusable part | - | - |
ILLUSTRATION
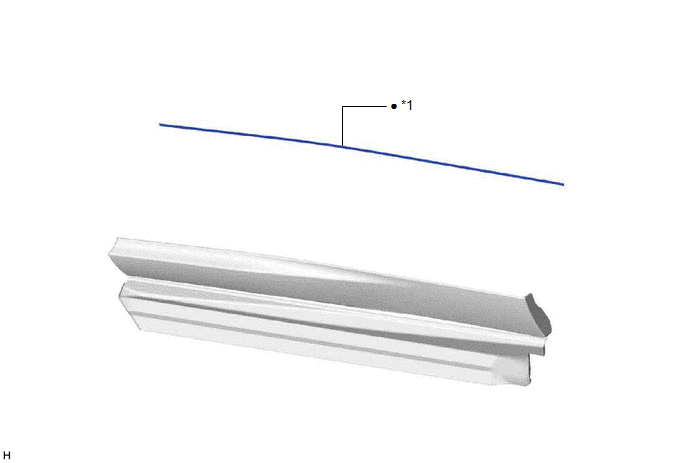
| *1 | REAR DOOR UPPER OUTSIDE MOULDING PAD | - | - |
| ● | Non-reusable part | - | - |
ILLUSTRATION
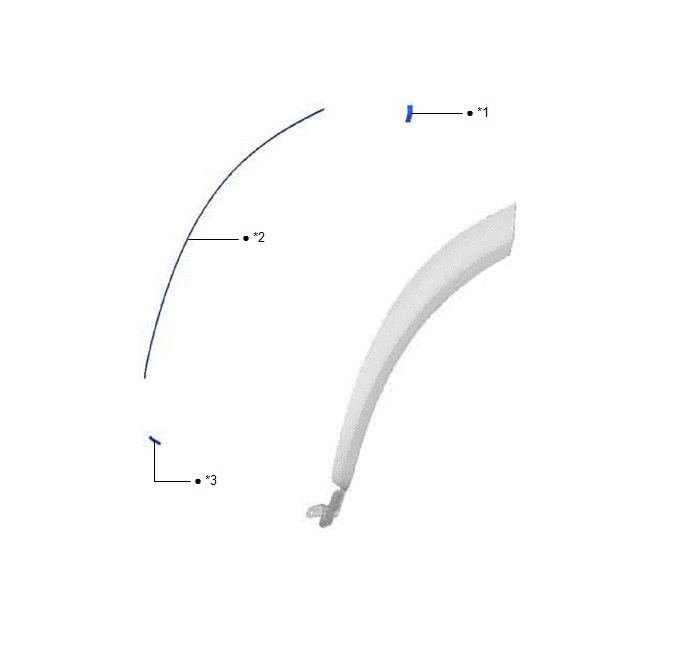
| *1 | NO. 2 MOULDING TAPE | *2 | REAR DOOR NO. 1 MOULDING PAD |
| *3 | REAR DOOR REAR OUTSIDE MOULDING PAD | - | - |
| ● | Non-reusable part | - | - |
READ NEXT:
 Removal
REMOVAL CAUTION / NOTICE / HINT HINT:
Use the same procedure for the RH and LH sides.
The procedures listed below are for the LH side.
PROCEDURE 1. REMOVE REAR DOOR LOWER OUTSIDE MOULDING SUB-
Disassembly
DISASSEMBLY CAUTION / NOTICE / HINT HINT:
Use the same procedure for the RH and LH sides.
The procedure listed below is for the LH side.
PROCEDURE 1. REMOVE REAR DOOR UPPER OUTSIDE MOULDING PA
Reassembly
REASSEMBLY CAUTION / NOTICE / HINT HINT:
Use the same procedure for the RH and LH sides.
The procedure listed below is for the LH side.
PROCEDURE 1. INSTALL NO. 2 MOULDING TAPE (a) When using
SEE MORE:
Diagnosis System
DIAGNOSIS SYSTEM DIAGNOSIS MODE FUNCTION (a) w/ Lane Centering Function: When a malfunction occurs in the lane tracing assist system system, the LTA indicator light illuminates yellow and a message is displayed on the multi-information display. Warning Message Details DTC/RoB LTA Indicator
Components
COMPONENTS ILLUSTRATION *1 FRONT SEAT INNER BELT ASSEMBLY LH *2 FRONT SEAT INNER BELT ASSEMBLY RH *3 FRONT SEAT BELT ANCHOR PLATE - - N*m (kgf*cm, ft.*lbf): Specified torque - -
© 2016-2026 Copyright www.lexunx.com
