Lexus NX: Components
COMPONENTS
ILLUSTRATION
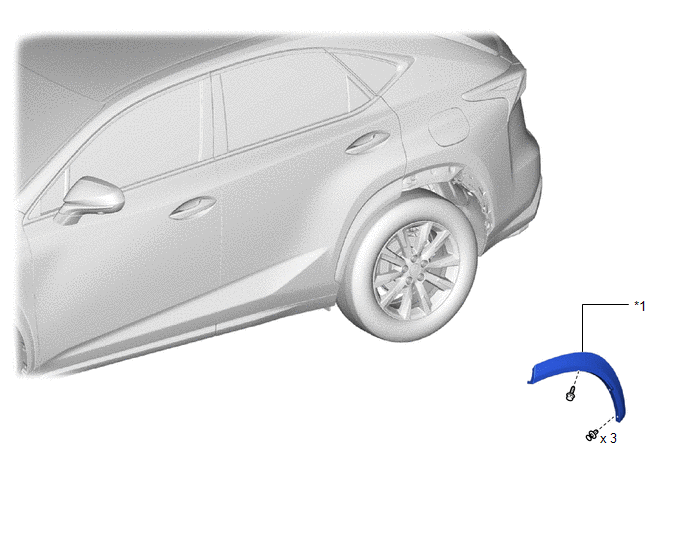
| *1 | QUARTER OUTSIDE MOULDING SUB-ASSEMBLY LH | - | - |
ILLUSTRATION
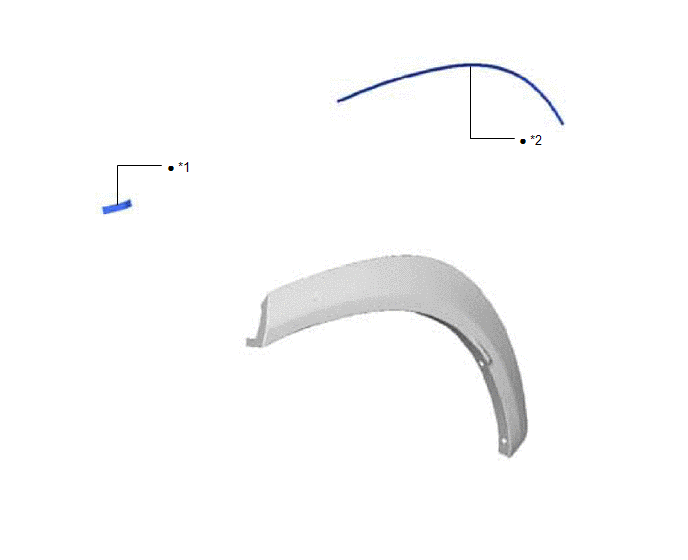
| *1 | NO. 5 MOULDING TAPE | *2 | REAR LOWER QUARTER MOULDING PROTECTOR LH |
| ● | Non-reusable part | - | - |
READ NEXT:
 Removal
REMOVAL CAUTION / NOTICE / HINT HINT:
Use the same procedure for the RH and LH sides.
The procedure listed below is for the LH side.
PROCEDURE 1. REMOVE QUARTER OUTSIDE MOULDING SUB-ASSEMBLY L
Disassembly
DISASSEMBLY CAUTION / NOTICE / HINT HINT:
Use the same procedure for the RH and LH sides.
The procedure listed below is for the LH side.
PROCEDURE 1. REMOVE NO. 5 MOULDING TAPE (a) Remove the
Reassembly
REASSEMBLY CAUTION / NOTICE / HINT HINT:
Use the same procedure for the RH and LH sides.
The procedure listed below is for the LH side.
PROCEDURE 1. INSTALL NO. 5 MOULDING TAPE (a) Clean the N
SEE MORE:
Removal
REMOVAL PROCEDURE 1. REMOVE ENGINE OIL LEVEL DIPSTICK GUIDE (a) Remove the engine oil level dipstick. (b) Remove the bolt and engine oil level dipstick guide. (c) Remove the O-ring from the engine oil level dipstick guide. 2. REMOVE V-RIBBED BELT TENSIONER ASSEMBLY (a) Remove the b
Removal
REMOVAL CAUTION / NOTICE / HINT HINT:
Use the same procedure for the RH and LH sides.
The procedures listed below are for the LH side.
PROCEDURE 1. REMOVE FRONT DOOR LOWER OUTSIDE MOULDING SUB-ASSEMBLY LH HINT: When removing the front door lower outside moulding sub-assembly LH, heat the fro
© 2016-2026 Copyright www.lexunx.com
