Lexus NX: Components
COMPONENTS
ILLUSTRATION
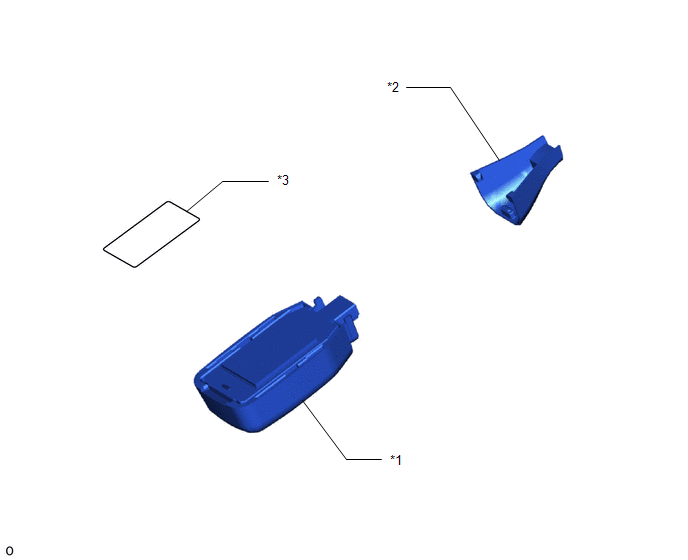
| *1 | RAIN SENSOR | *2 | RAIN SENSOR COVER |
| *3 | RAIN SENSOR TAPE | - | - |
READ NEXT:
 On-vehicle Inspection
ON-VEHICLE INSPECTION PROCEDURE 1. INSPECT RAIN SENSOR (a) Remove the rain sensor cover. Click here (b) Disconnect the rain sensor connector. *a Front view of wire harness connecto
Removal
REMOVAL PROCEDURE 1. REMOVE RAIN SENSOR COVER (a) Detach the 2 claws and remove the rain sensor cover. 2. REMOVE RAIN SENSOR (a) Disconnect the connector. (b) Release
Inspection
INSPECTION PROCEDURE 1. INSPECT MAP LIGHT ASSEMBLY (RAIN SENSOR CIRCUIT) (a) Remove the map light assembly. Click here (b) Measure the resistance according to the value(s) in the table below. Sta
SEE MORE:
Diagnostic Trouble Code Chart
DIAGNOSTIC TROUBLE CODE CHART Power Tilt and Power Telescopic Steering Column System DTC No. Detection Item DTC Detection Condition Link B2603 Tilt and Telescopic Manual Switch Circuit Malfunction When operating the tilt and telescopic switch, an abnormal voltage value is sent to th
Diagnostic Trouble Code Chart
DIAGNOSTIC TROUBLE CODE CHART Immobiliser System DTC No. Detection Item Link B2779 Engine Starter Communication Malfunction B2784 Antenna Coil Open / Short B278A Short to GND in Immobiliser System Power Source Circuit B2790 ID BOX EEPROM Malfunction
© 2016-2026 Copyright www.lexunx.com
