Lexus NX: Removal
REMOVAL
PROCEDURE
1. PRECAUTION
CAUTION:
Be sure to read precaution thoroughly before servicing.
Click here .gif)
2. REMOVE REAR WHEEL (for LH Side)
Click here
3. REMOVE QUARTER OUTSIDE MOULDING SUB-ASSEMBLY LH
Click here
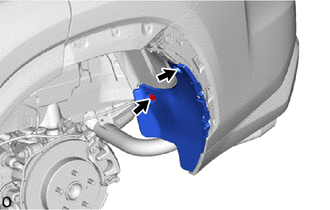
4. REMOVE REAR BUMPER SIDE SEAL LH
| (a) Remove the 2 clips and rear bumper side seal LH. |
|
5. REMOVE REAR WHEEL HOUSE FRONT PLATE LH
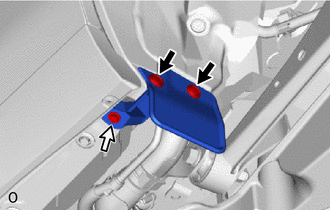
.png) | Clip |
.png) | Screw |
(a) Remove the 2 clips, screw and rear wheel house front plate LH.
6. REMOVE REAR WHEEL HOUSE LINER LH
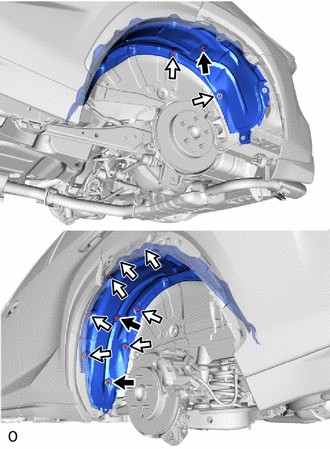
| | Clip (A) |
| | Clip (B) |
(a) Remove the 3 clips (A), 9 clips (B) and rear wheel house liner LH.
7. REMOVE REAR TIRE PRESSURE MONITOR INITIATOR
| (a) Remove the service hole cover, and then disconnect the connector of the rear tire pressure monitor initiator. |
|
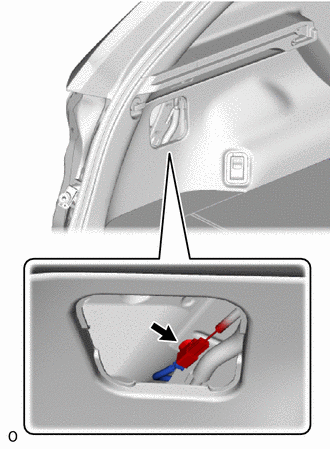
| (b) Disconnect the grommet. |
|
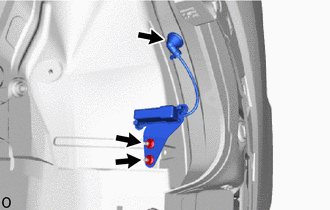
(c) Remove the 2 nuts and rear tire pressure monitor initiator.
READ NEXT:
 Installation
INSTALLATION PROCEDURE 1. PRECAUTION CAUTION: Be sure to read precaution thoroughly before servicing. Click here 2. INSTALL REAR TIRE PRESSURE MONITOR INITIATOR (a) Install the rear tire pressure mo
Components
COMPONENTS ILLUSTRATION *1 DECK FLOOR BOX LH *2 NO. 3 DECK BOARD SUB-ASSEMBLY *3 REAR DECK FLOOR BOX *4 NEGATIVE AUXILIARY BATTERY TERMINAL N*m (kgf*cm, ft.*lbf): Specified
SEE MORE:
Lost Communication with Cruise Control Front Distance Range Sensor Missing Message (U023587,U0242)
DESCRIPTION DTC No. Detection Item DTC Detection Condition Trouble Area DTC Output from Note U023587 Lost Communication with Cruise Control Front Distance Range Sensor Missing Message
Power switch on (IG)
A communication malfunction with the millimeter wave radar sensor
Components
COMPONENTS ILLUSTRATION *1 OUTSIDE MOULDING RETAINER *2 REAR DOOR LOWER OUTSIDE MOULDING SUB-ASSEMBLY LH *3 REAR DOOR NO. 2 WEATHERSTRIP LH *4 REAR DOOR REAR UPPER OUTSIDE MOULDING LH *5 HOLE COVER - - ● Non-reusable part - - ILLUSTRATION *1 REAR DO
