Lexus NX: Removal
REMOVAL
CAUTION / NOTICE / HINT
HINT:
- Use the same procedure for the RH and LH sides.
- The procedure described below is for the LH side.
PROCEDURE
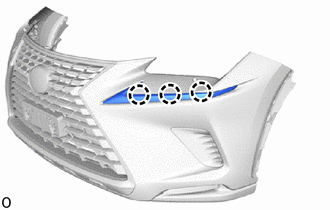
1. REMOVE FRONT BUMPER ASSEMBLY
(a) except Sport Package:
Click here .gif)
(b) for Sport Package:
Click here
2. REMOVE CLEARANCE LIGHT ASSEMBLY LH
(a) w/ Headlight Cleaner System:
| (1) Detach the claw and disconnect the headlight cleaner hose. |
|
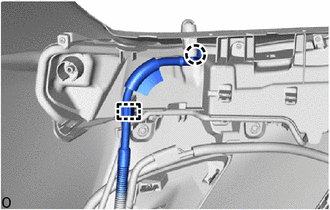
(2) Detach the hose clamp.
| (b) Detach the 2 wire harness clamps. |
|
.png)
(c) Remove the clip and 3 screws.
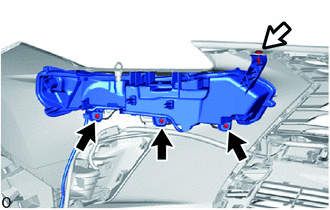
.png) | Screw |
.png) | Clip |
| (d) Detach the 3 claws and remove the clearance light assembly LH. |
|
READ NEXT:
 Inspection
INSPECTION PROCEDURE 1. INSPECT CLEARANCE LIGHT ASSEMBLY LH (a) Apply battery voltage to the connector and check the light illumination condition. OK: Battery Connection Specified Condition
Installation
INSTALLATION CAUTION / NOTICE / HINT HINT:
Use the same procedure for the RH and LH sides.
The procedure described below is for the LH side.
PROCEDURE 1. INSTALL CLEARANCE LIGHT ASSEMBLY LH (a
SEE MORE:
Installation
INSTALLATION PROCEDURE 1. INSTALL TRIP SWITCH (LIGHT CONTROL RHEOSTAT) (a) Attach the 2 claws to install the trip switch (light control rheostat). 2. INSTALL NO. 1 INSTRUMENT PANEL SAFETY PAD SUB-ASSEMBLY Click here 3. INSTALL INSTRUMENT SIDE PANEL LH Click here
Components
COMPONENTS ILLUSTRATION *1 DECK FLOOR BOX LH *2 NO. 3 DECK BOARD SUB-ASSEMBLY *3 REAR DECK FLOOR BOX *4 NEGATIVE AUXILIARY BATTERY TERMINAL N*m (kgf*cm, ft.*lbf): Specified torque - - ILLUSTRATION *1 BATTERY SERVICE HOLE COVER *2 HYBRID BATTERY SERVICE PLU
© 2016-2026 Copyright www.lexunx.com
